Hands On Labs
- Oracle Code Sydney July 2017
Create the OCCS Instance
This section provides instructions to create an OCCS Service Instance, create a Stack definition and deploy the MedRec app and MongoDB into Docker containers on OCCS.
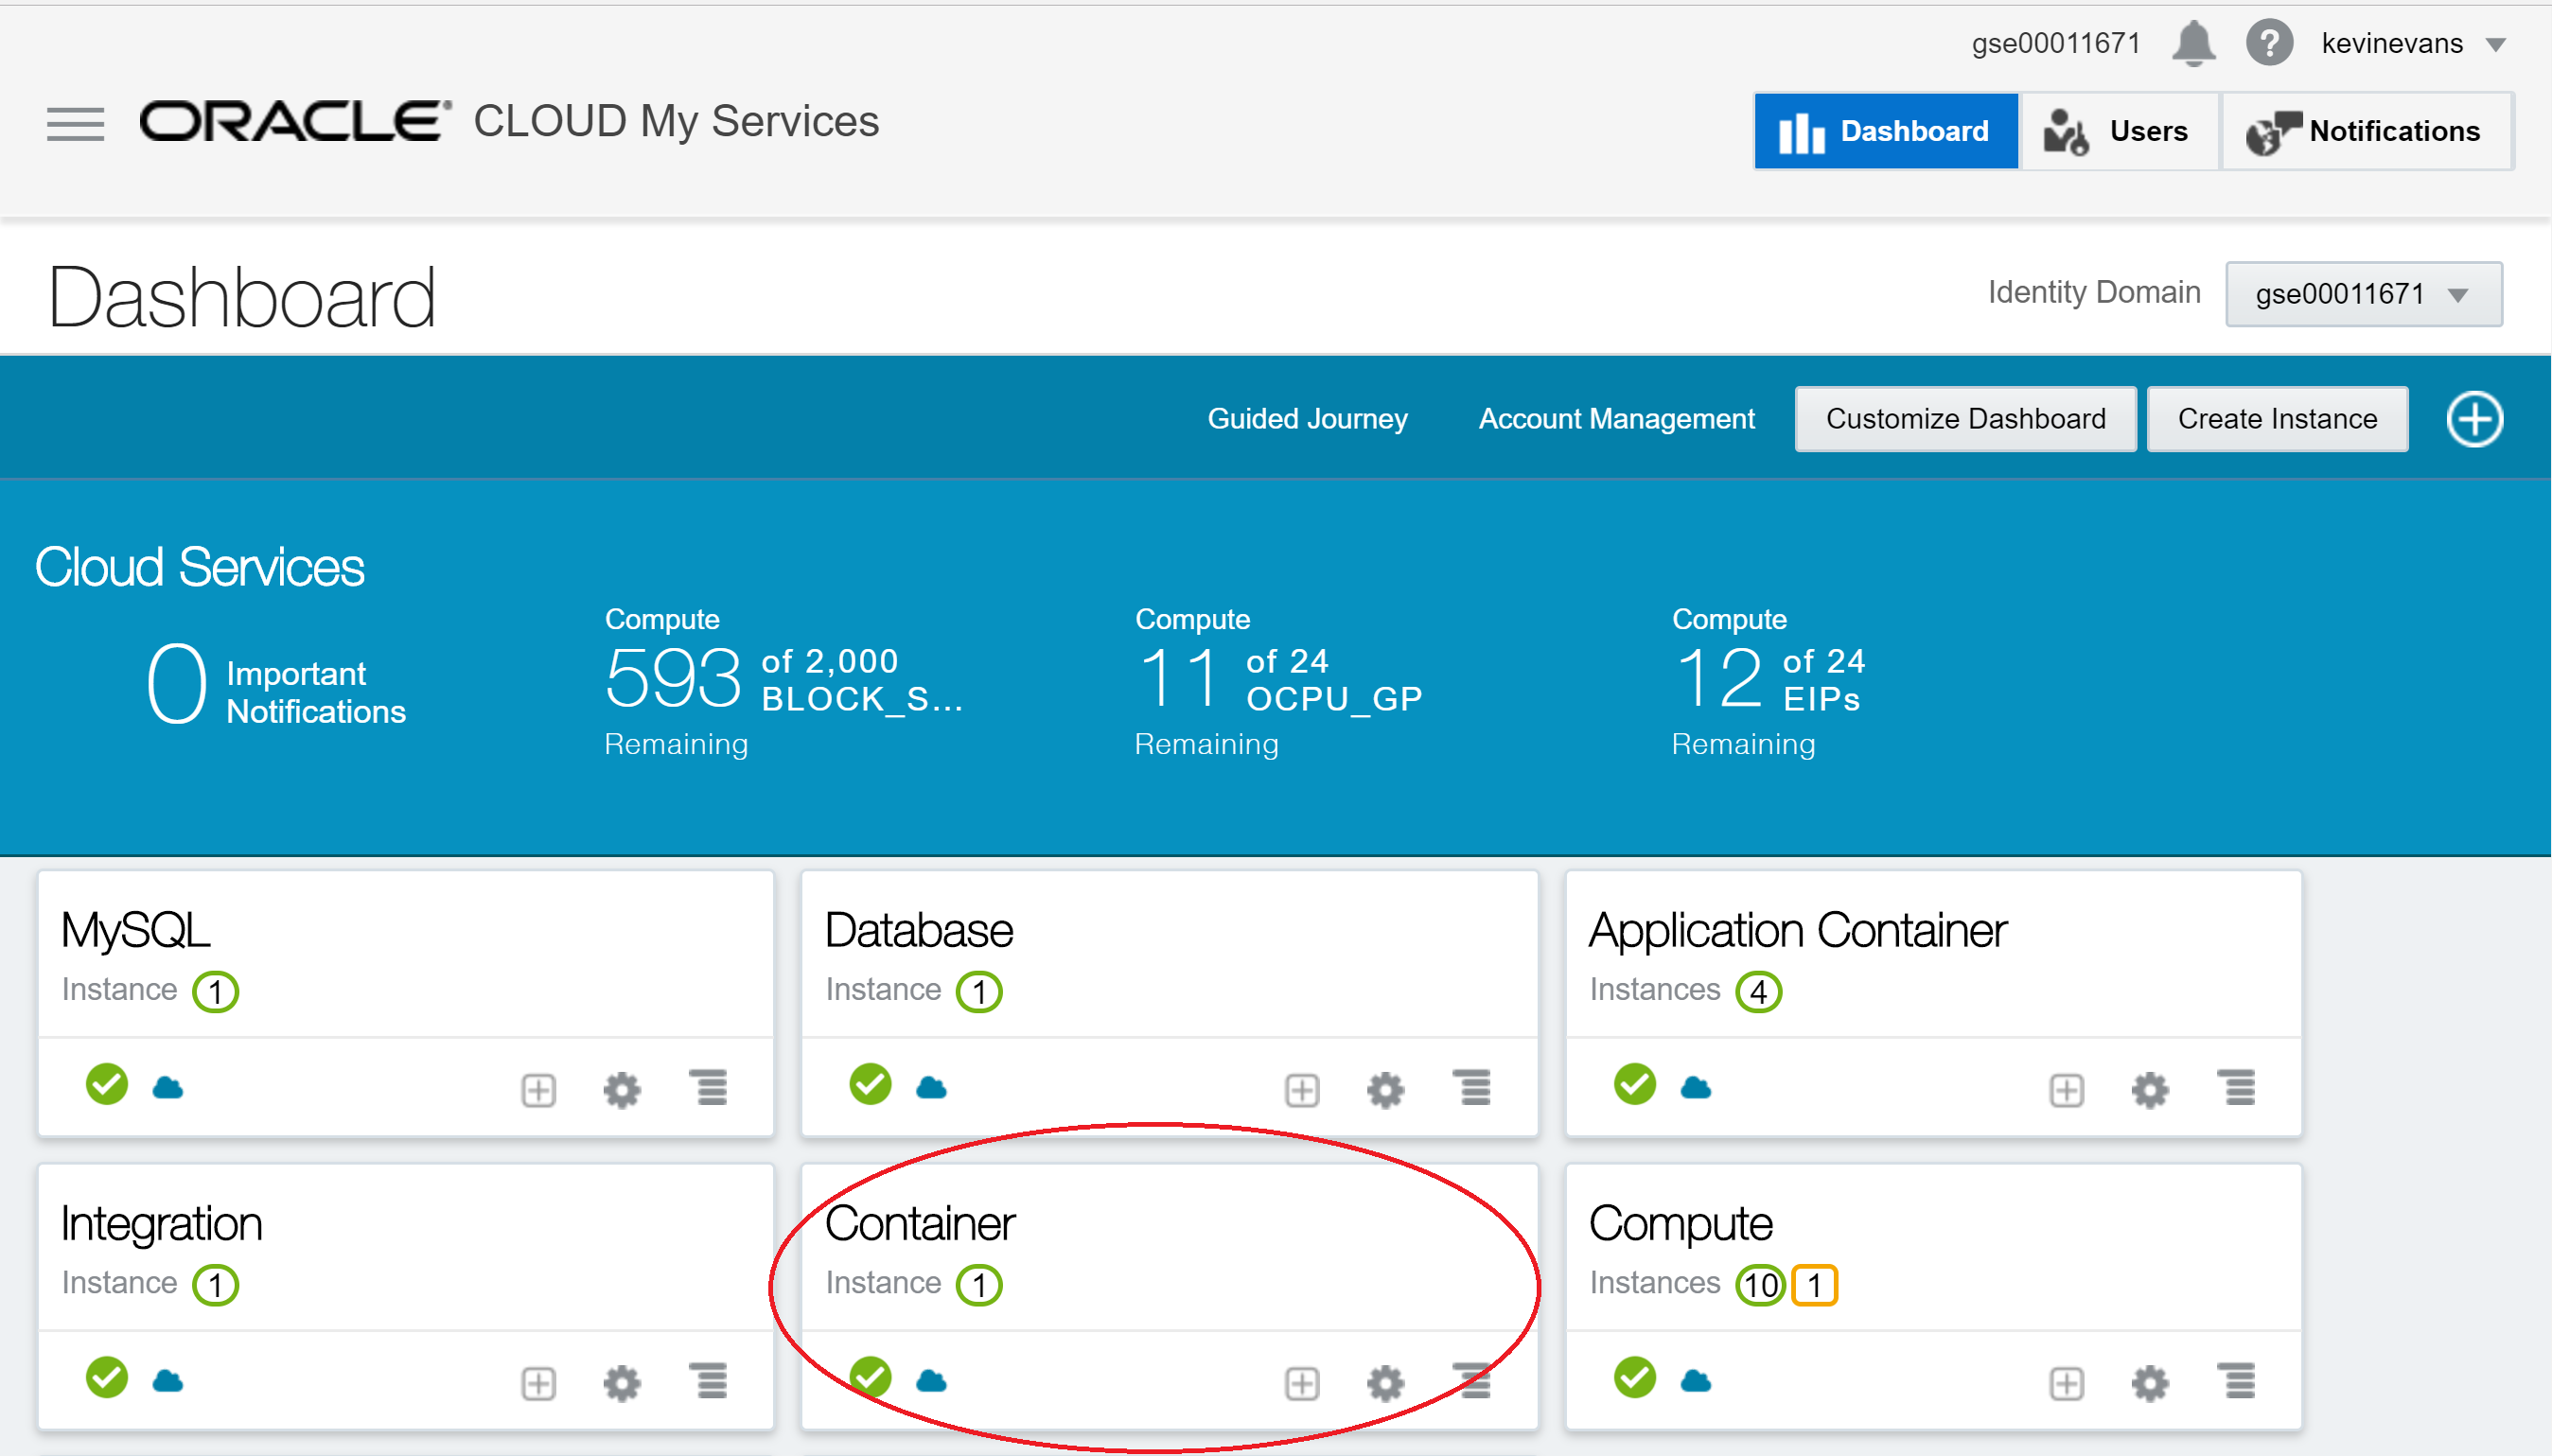
It is assumed that you already have registered for an Oracle Public Cloud subscription. From the Service Dashboard.
Click on the Container link
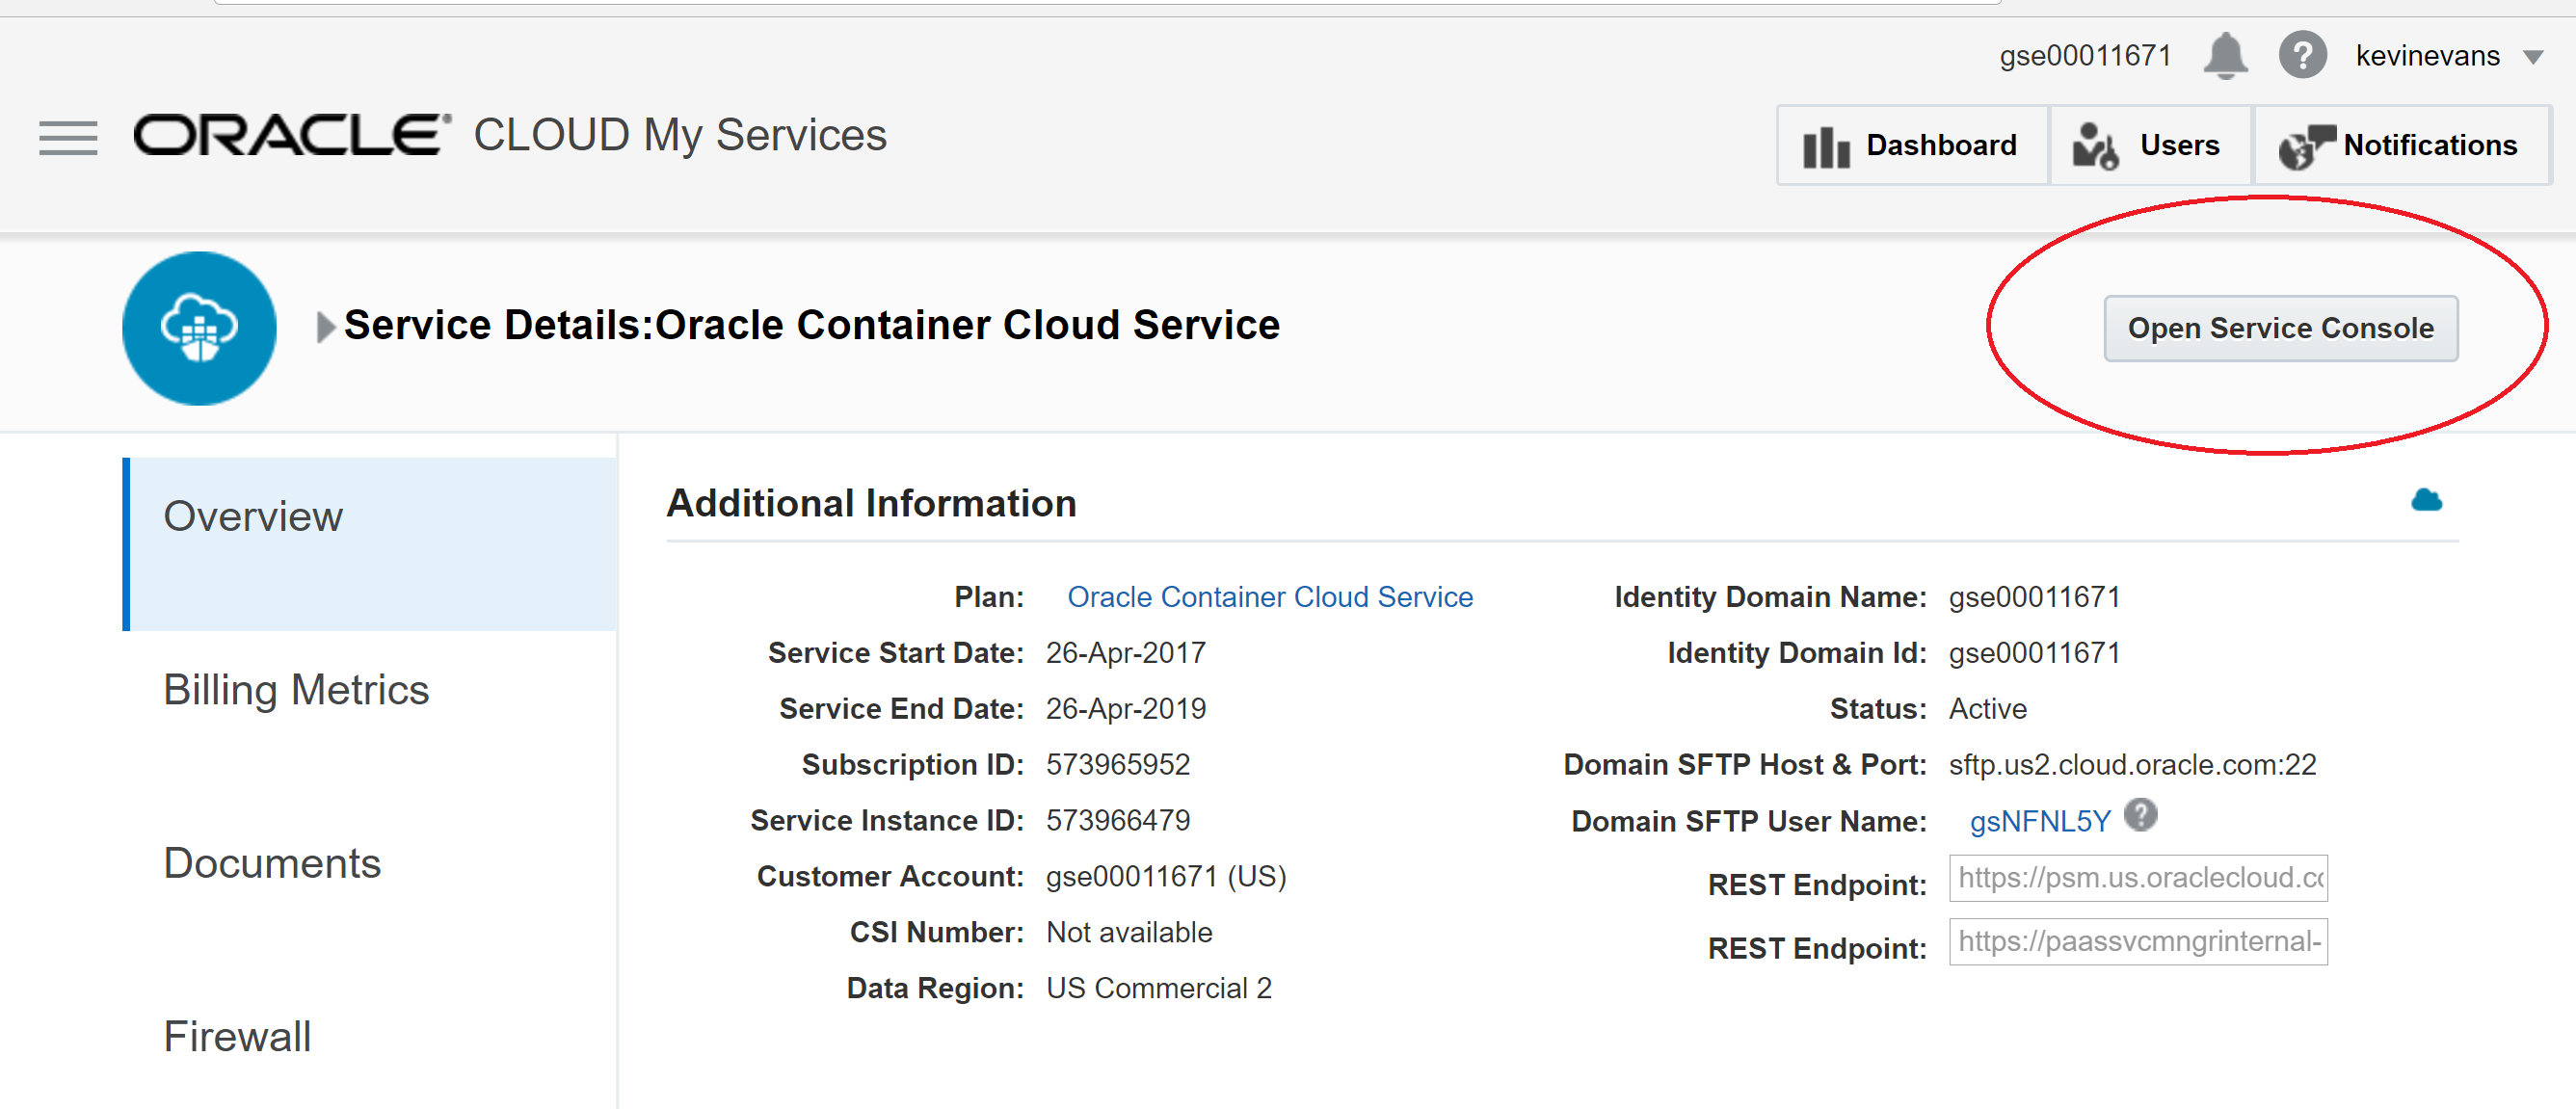
Click Open Service Console button
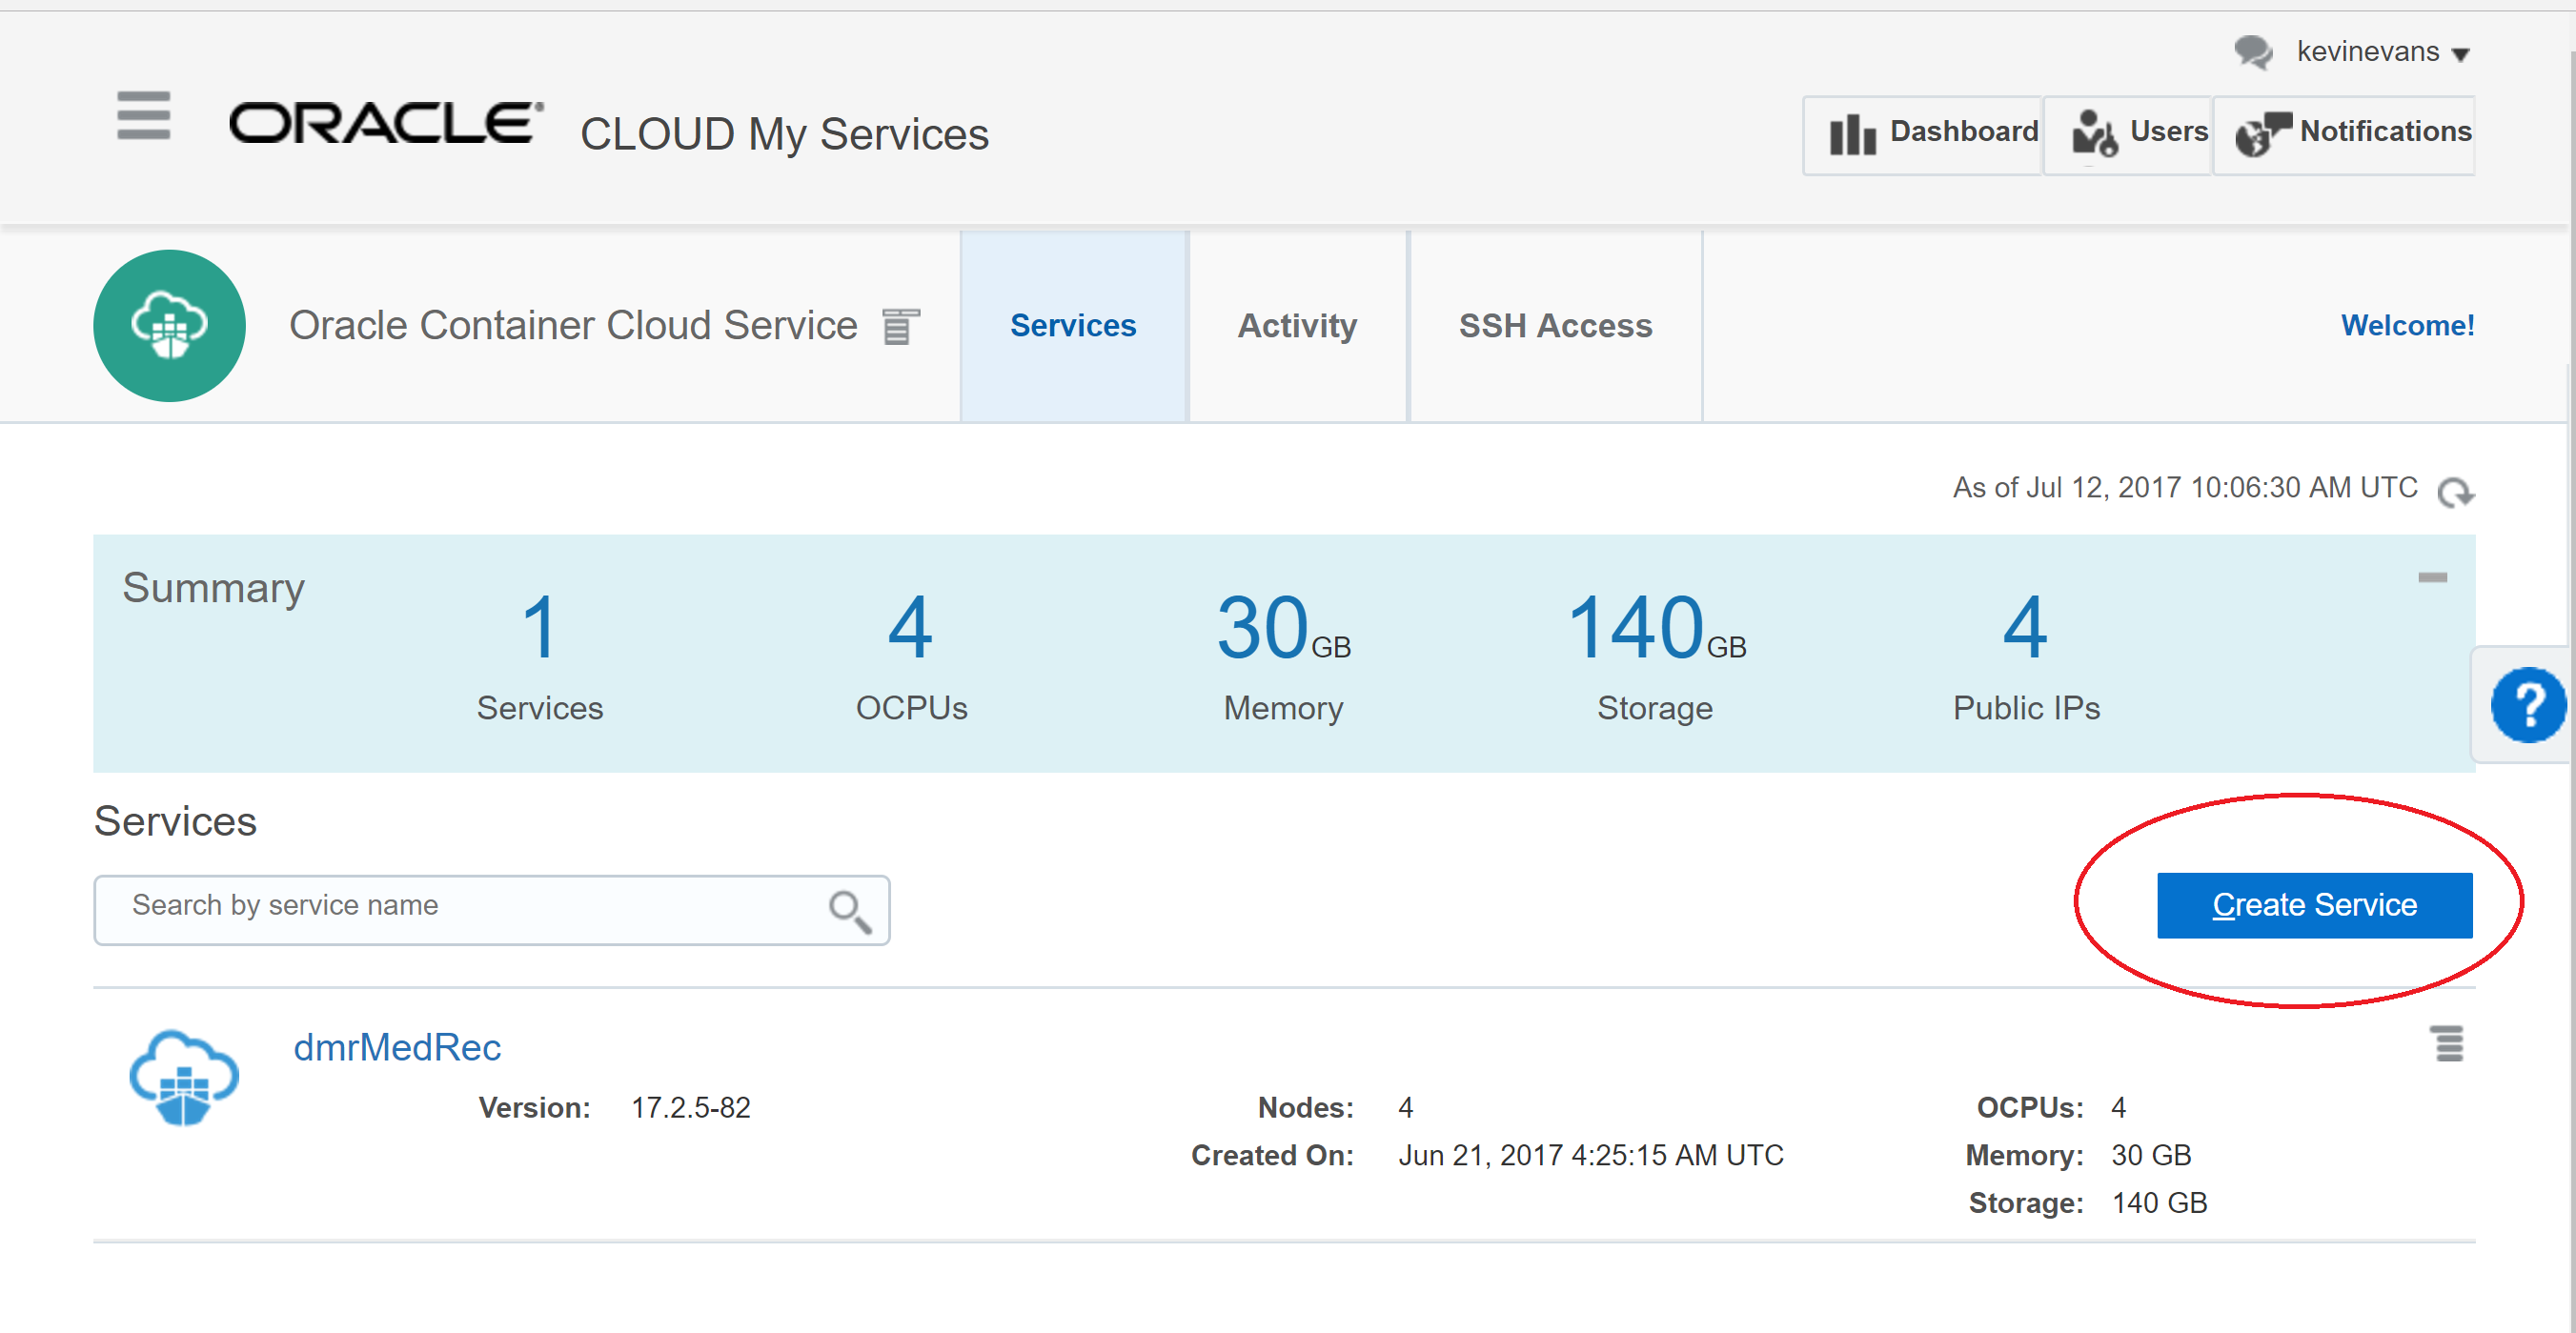
Click Create Service button
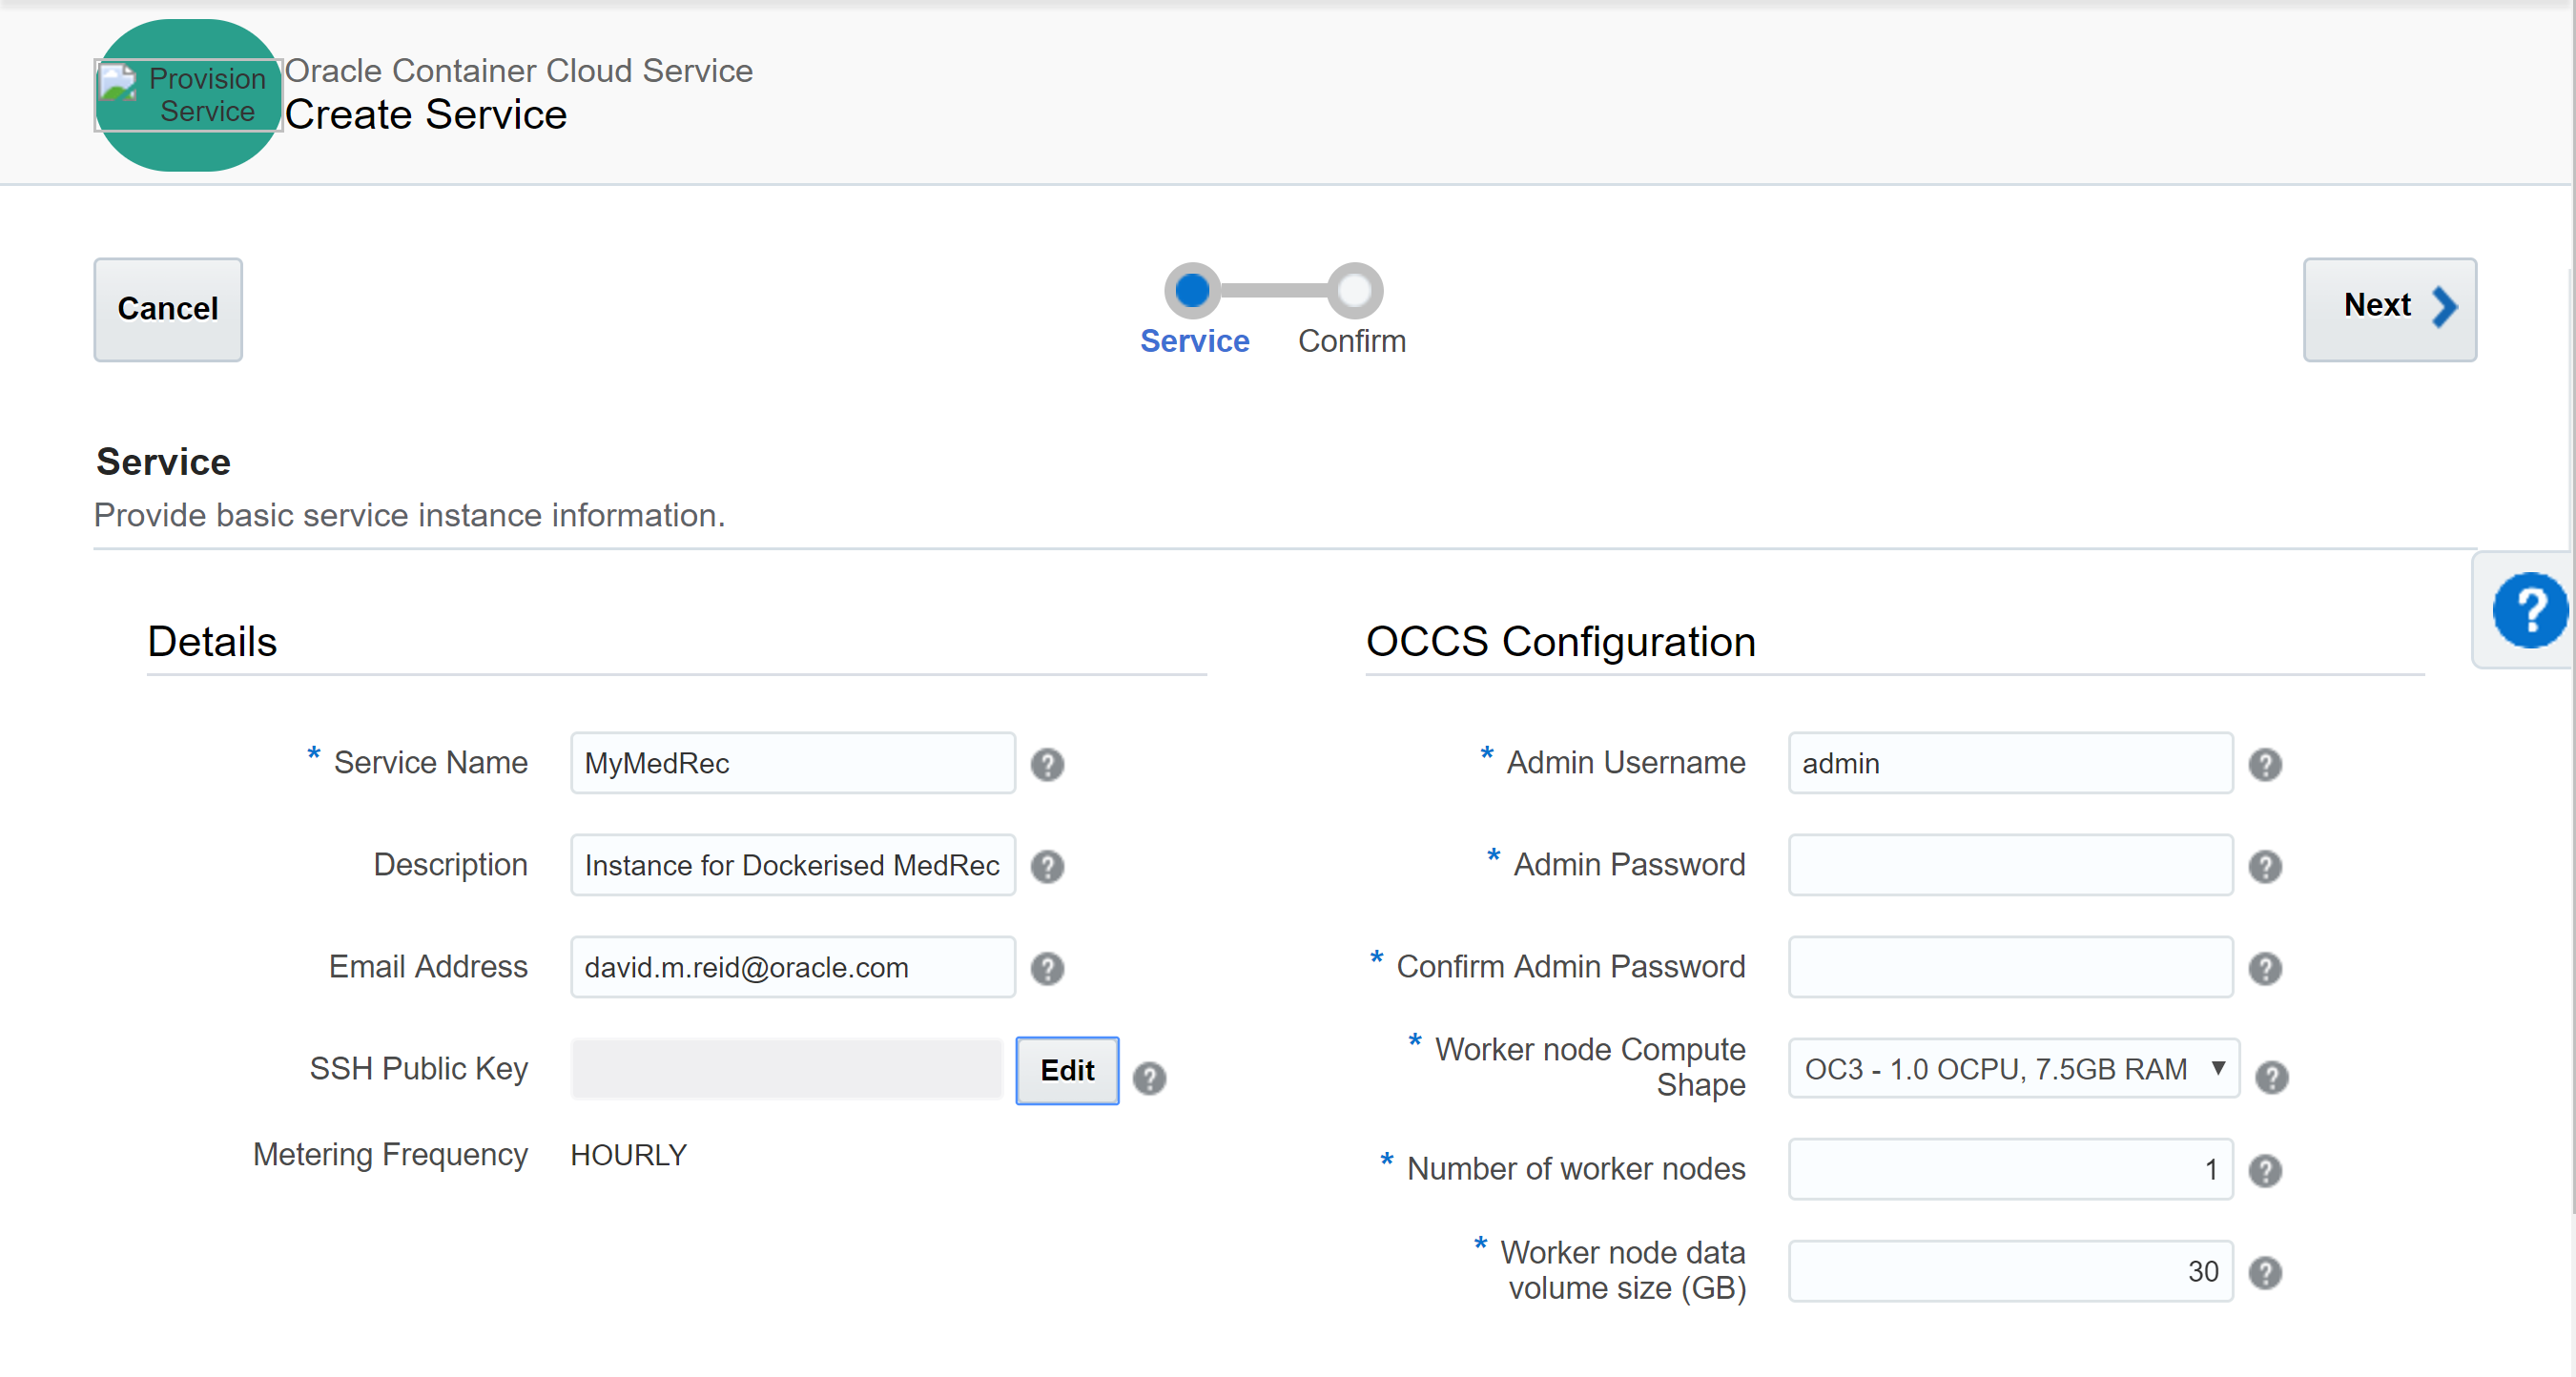
Give your Service a Name and Description.
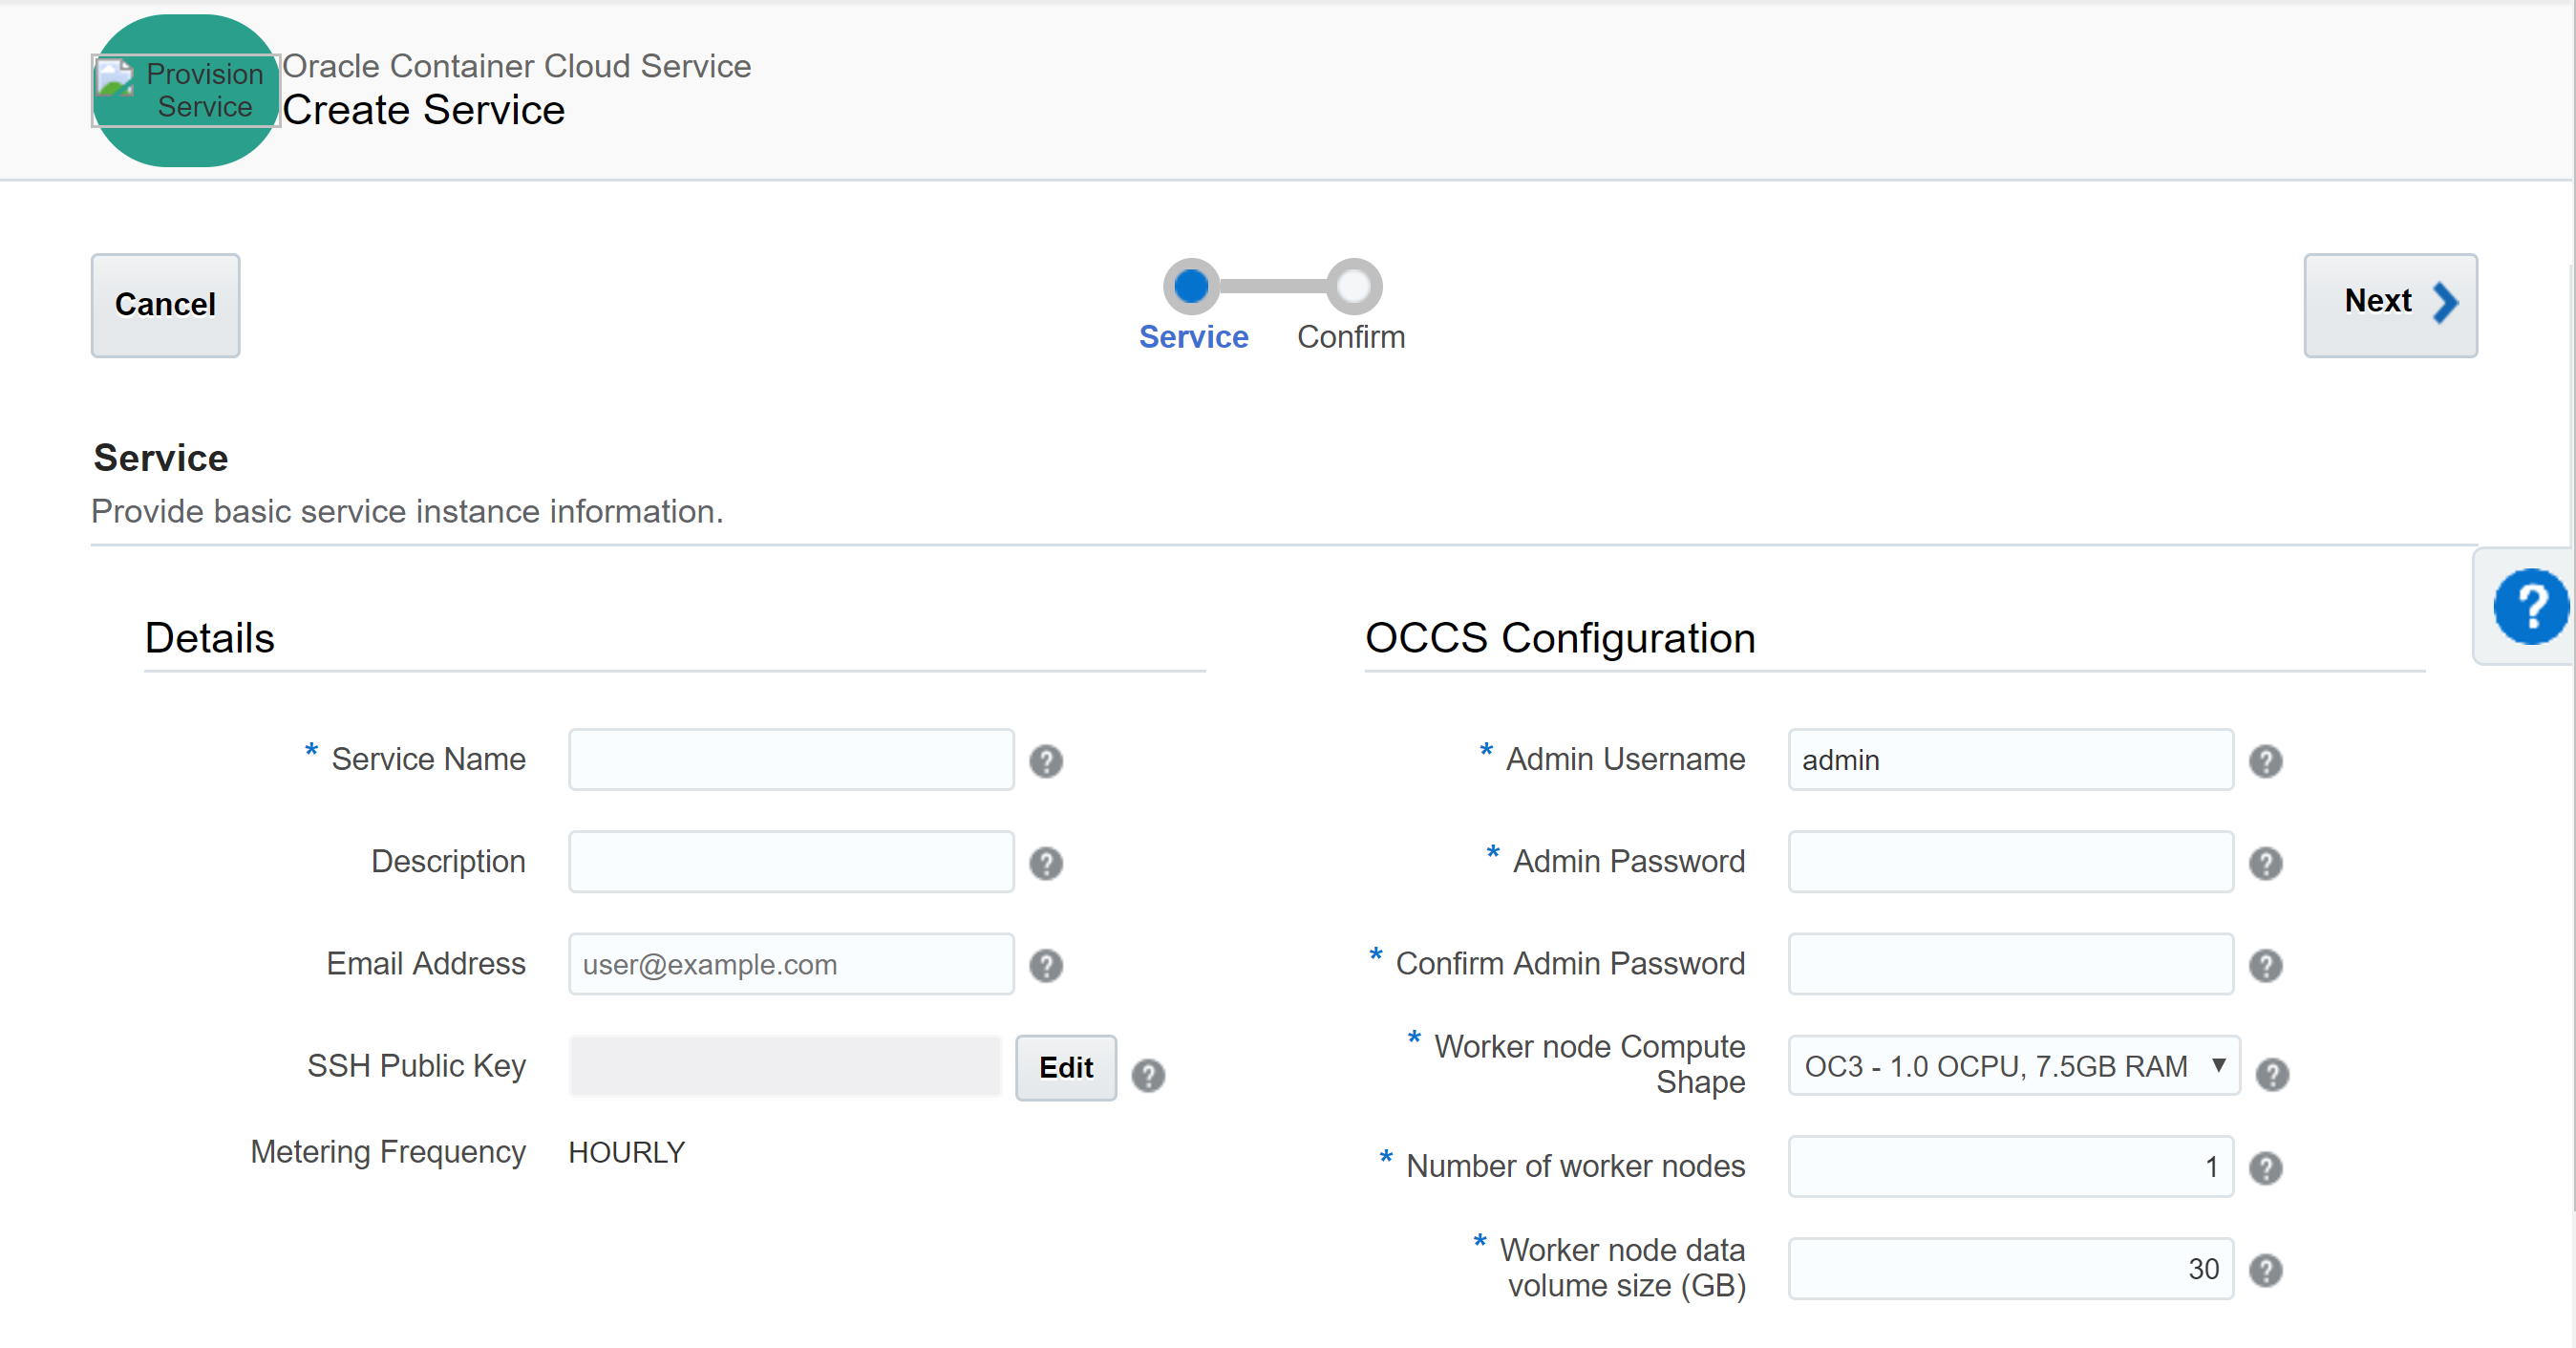
For example - as follows
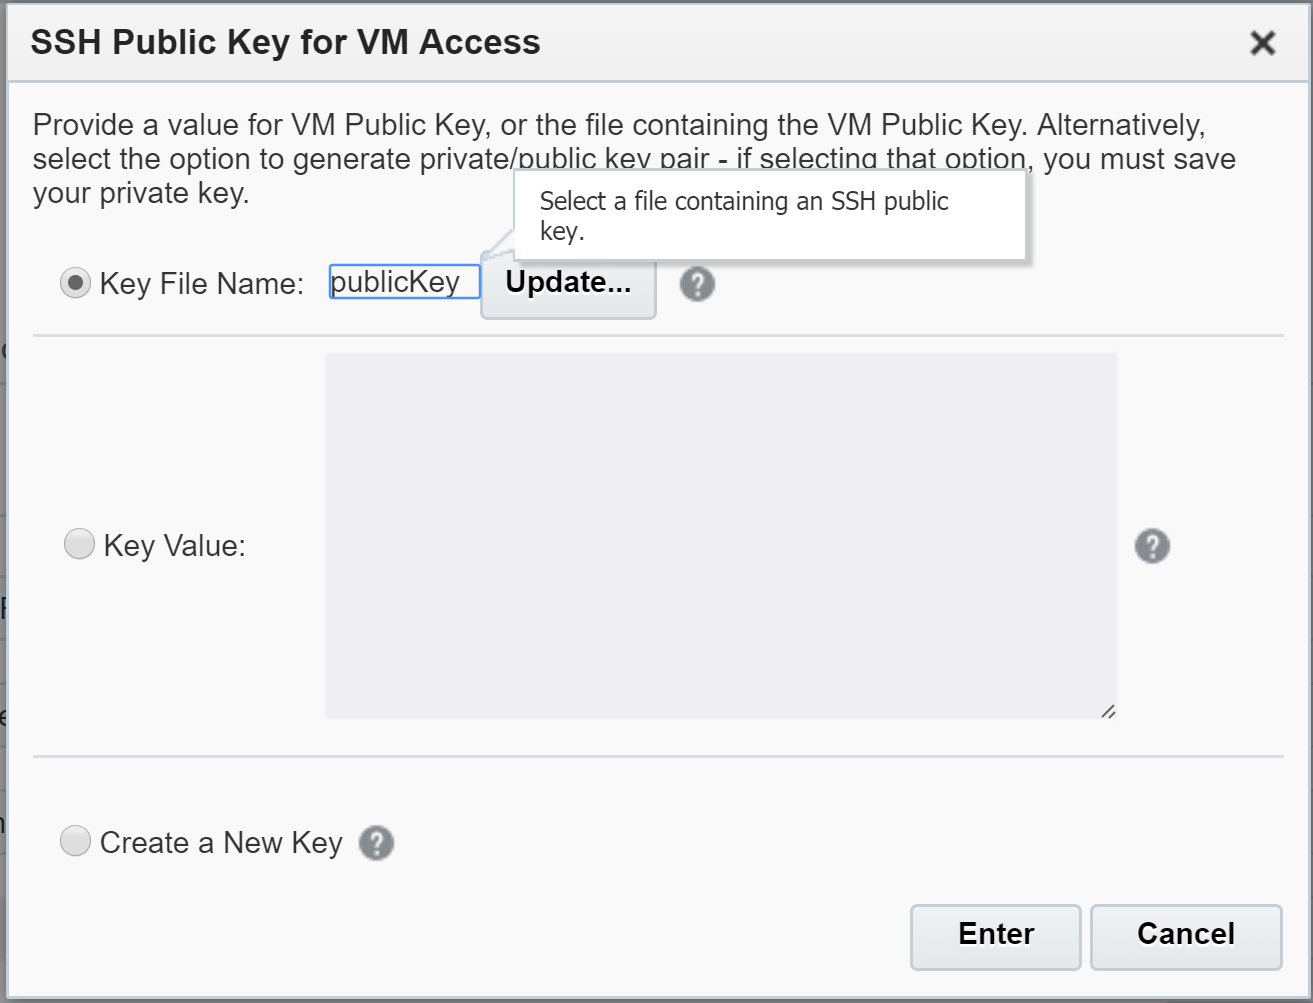
If you have an existing RSA public/private key pair choose File to browse for your Public Key, Otherwise click to Create A New Key.
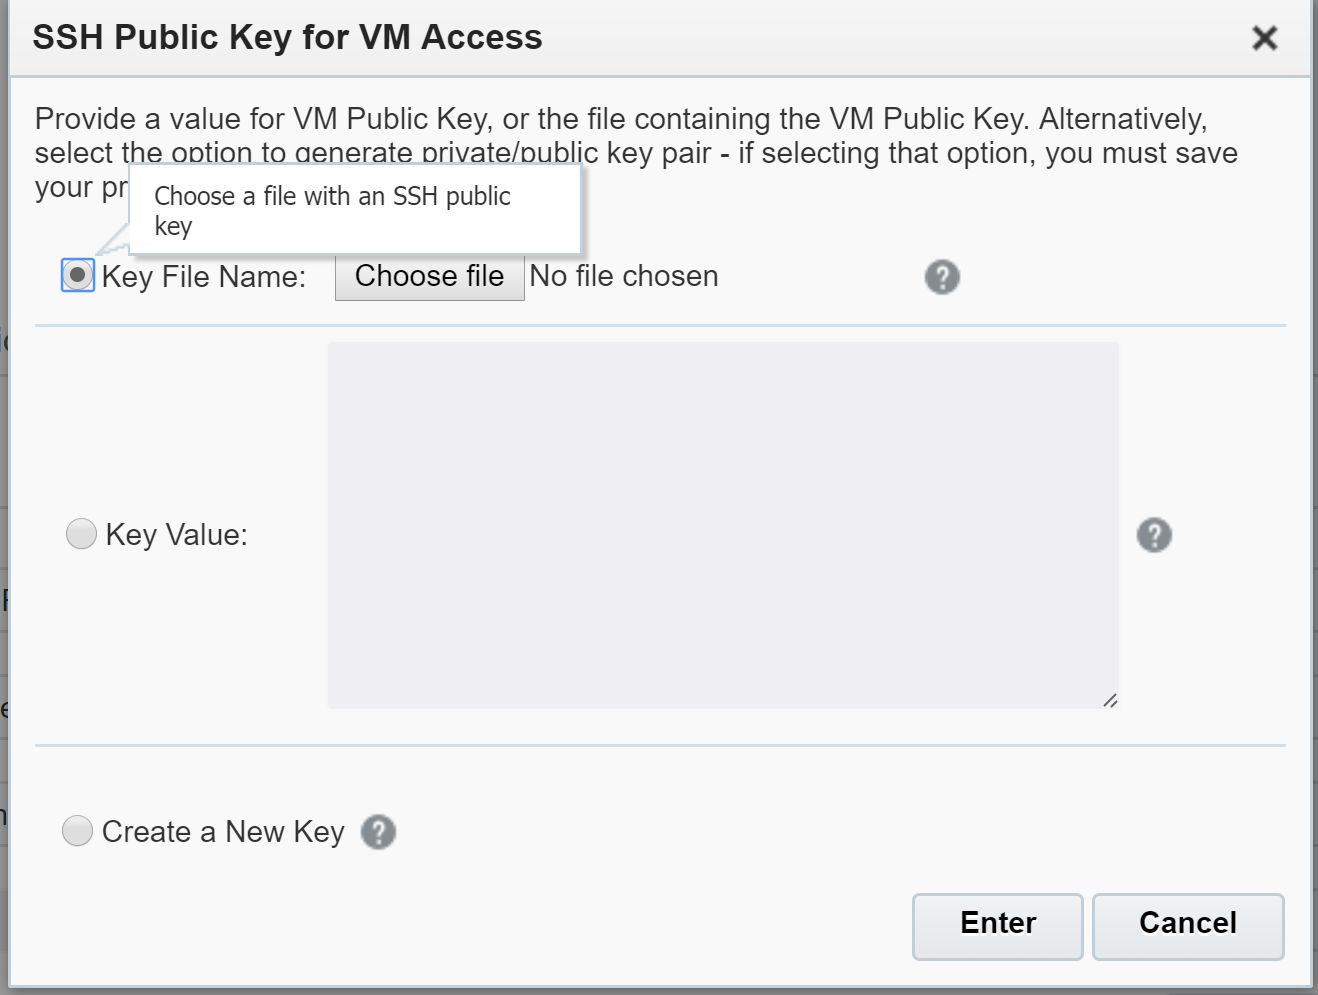
In this example, I used my existing public key from my file system.
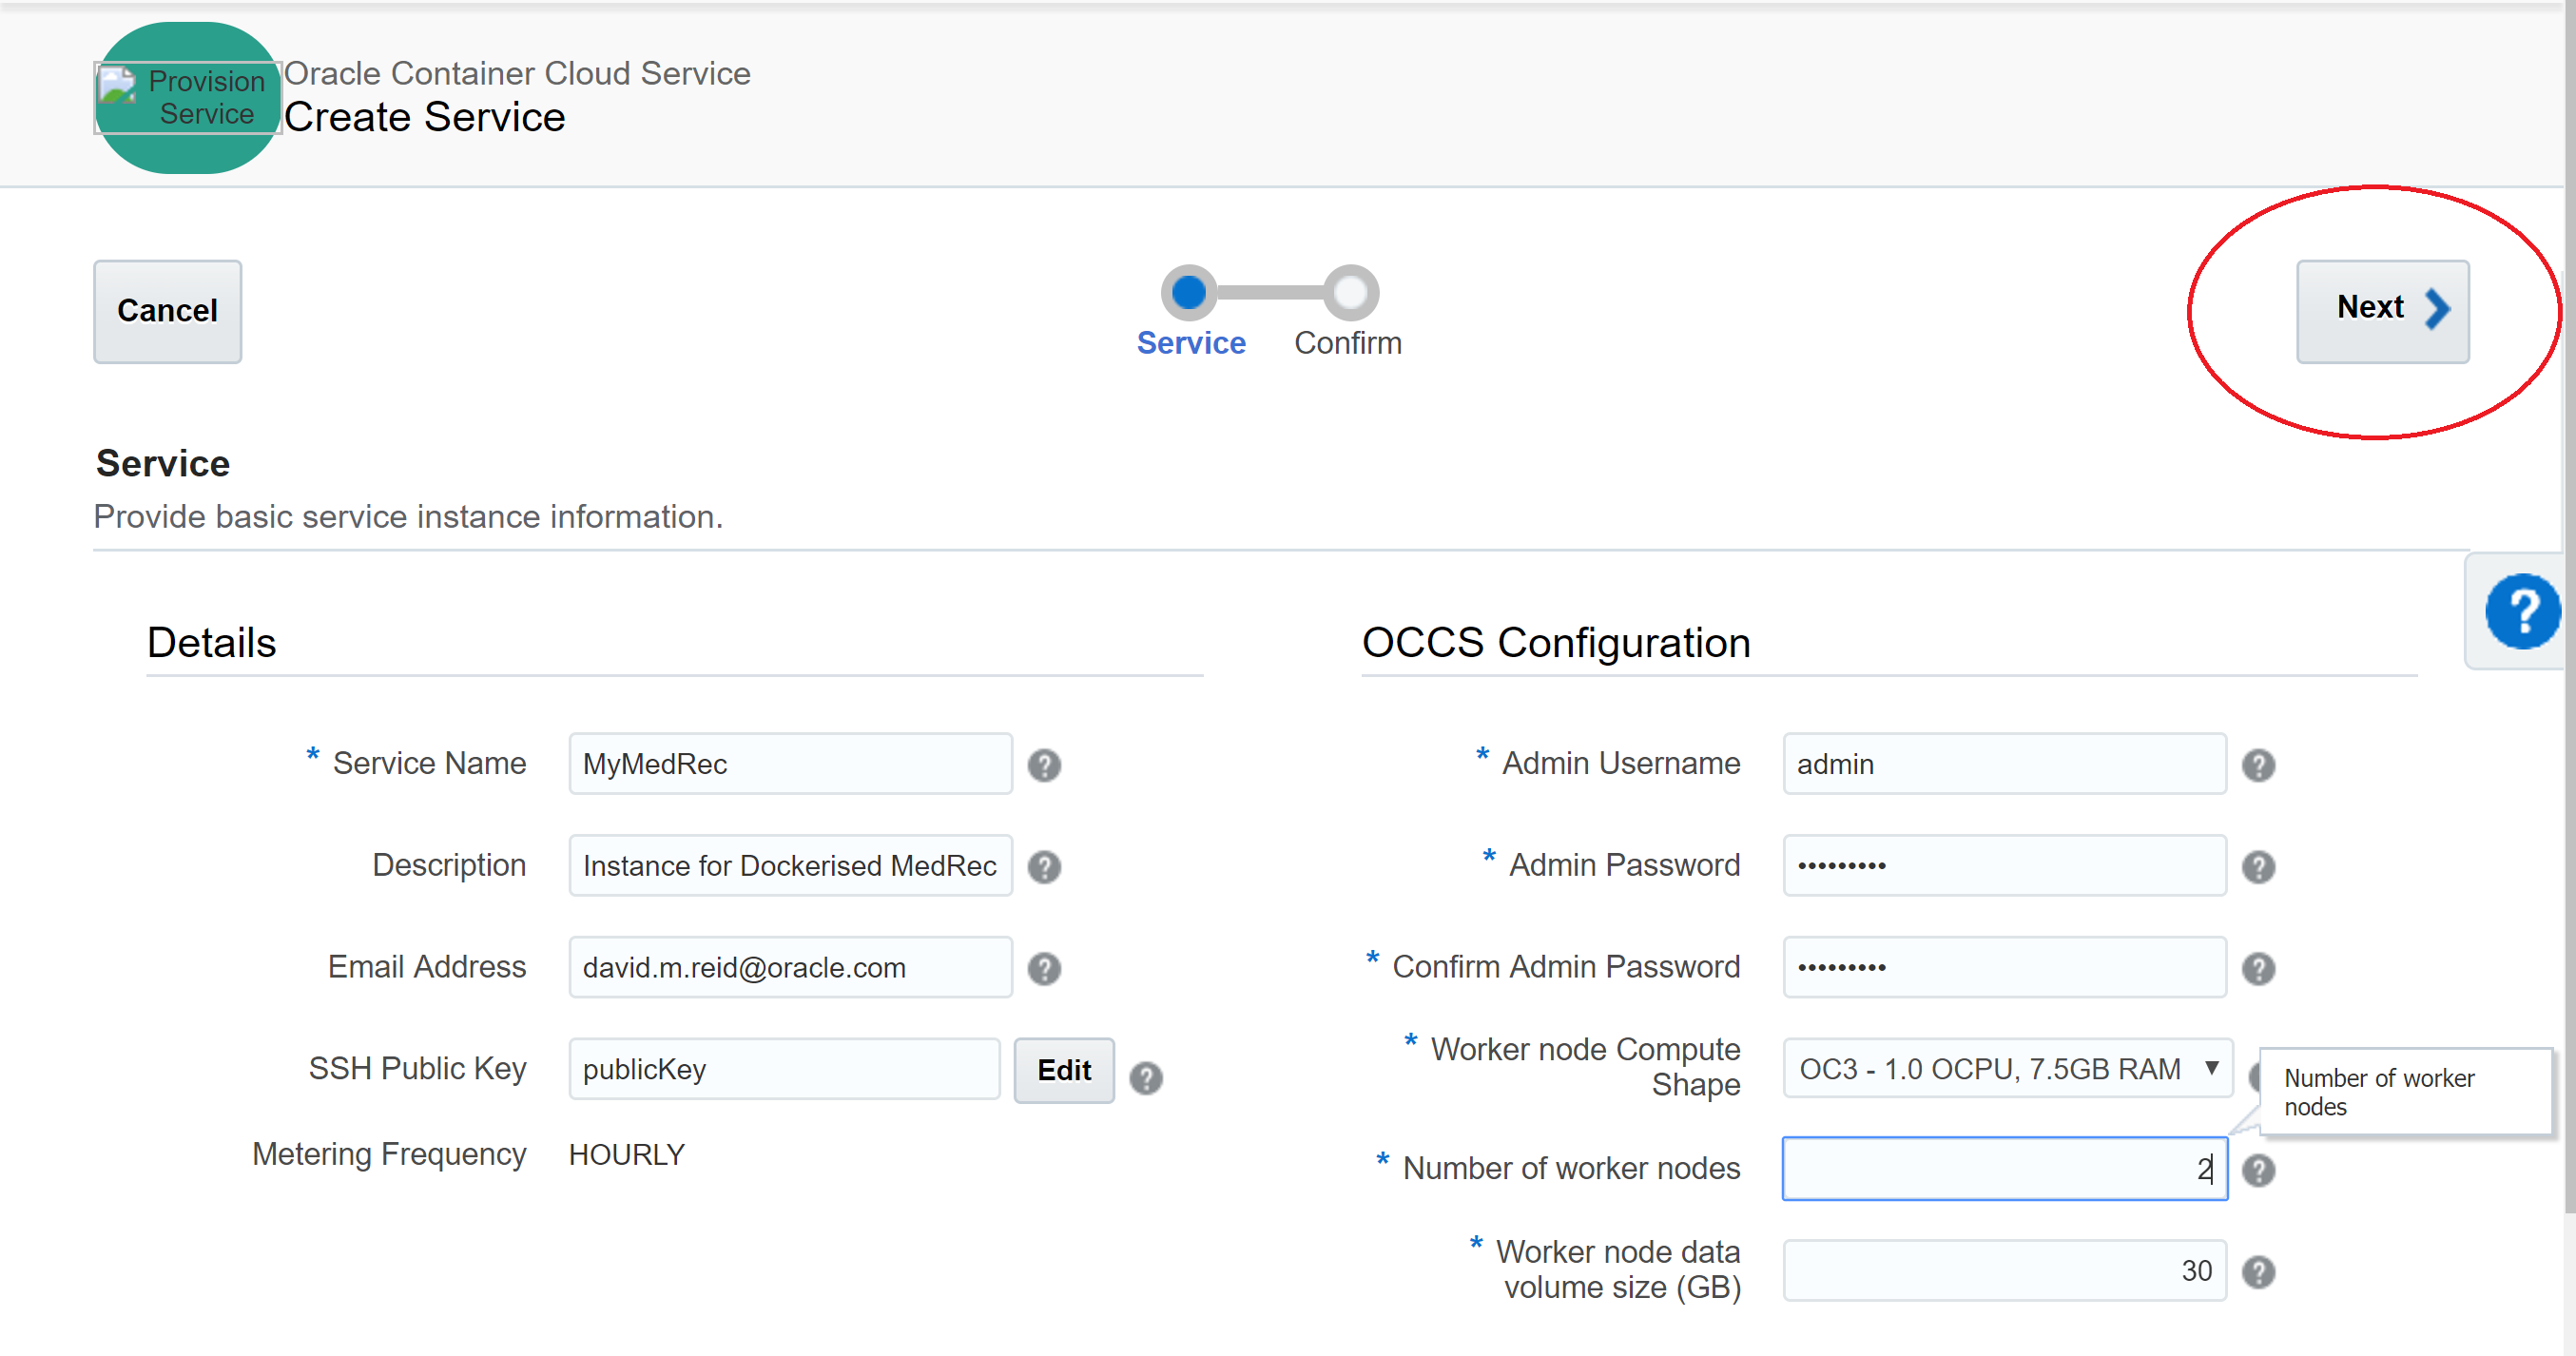
- Specify the username (admin) and password.
- Choose the compute shape. To preserve your credits I suggest you accept the default value.
- Choose the number of worker nodes you want to spread your Docker workload across.
In this example, you can get away with 1 worker node to run both the web app container and the MongoDB container.
- Then, click Next
Review your configuration on the Summary Page. Click Create.
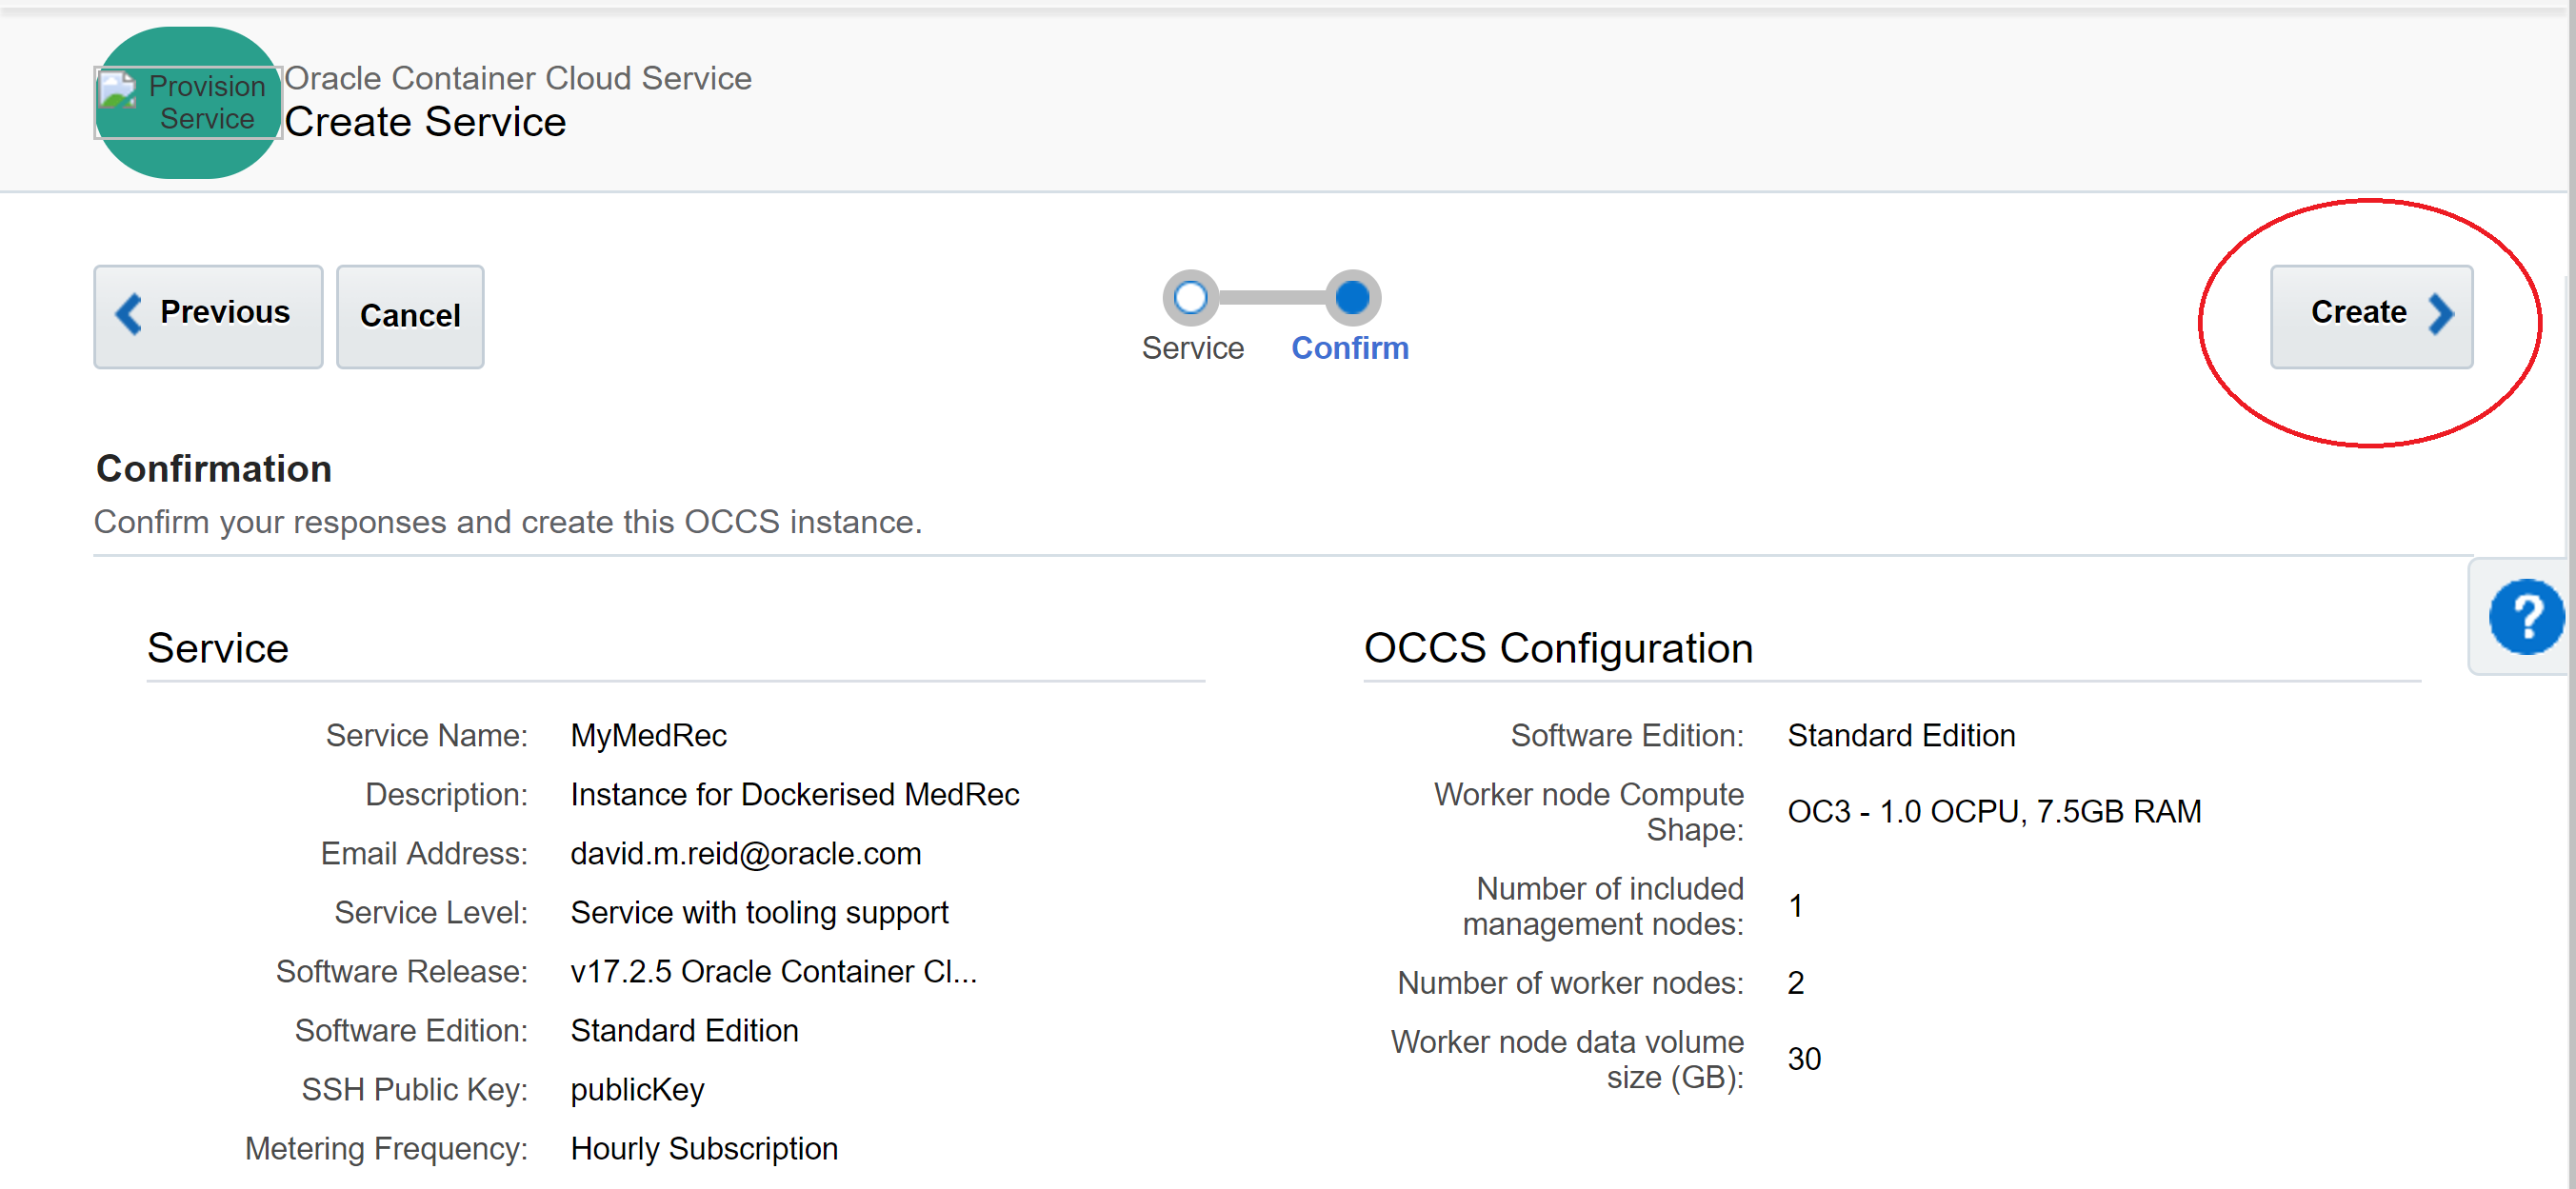
You will see that your Service is being created. It took around 5 minutes to provision the service. Periodically click the refresh icon to view progress.
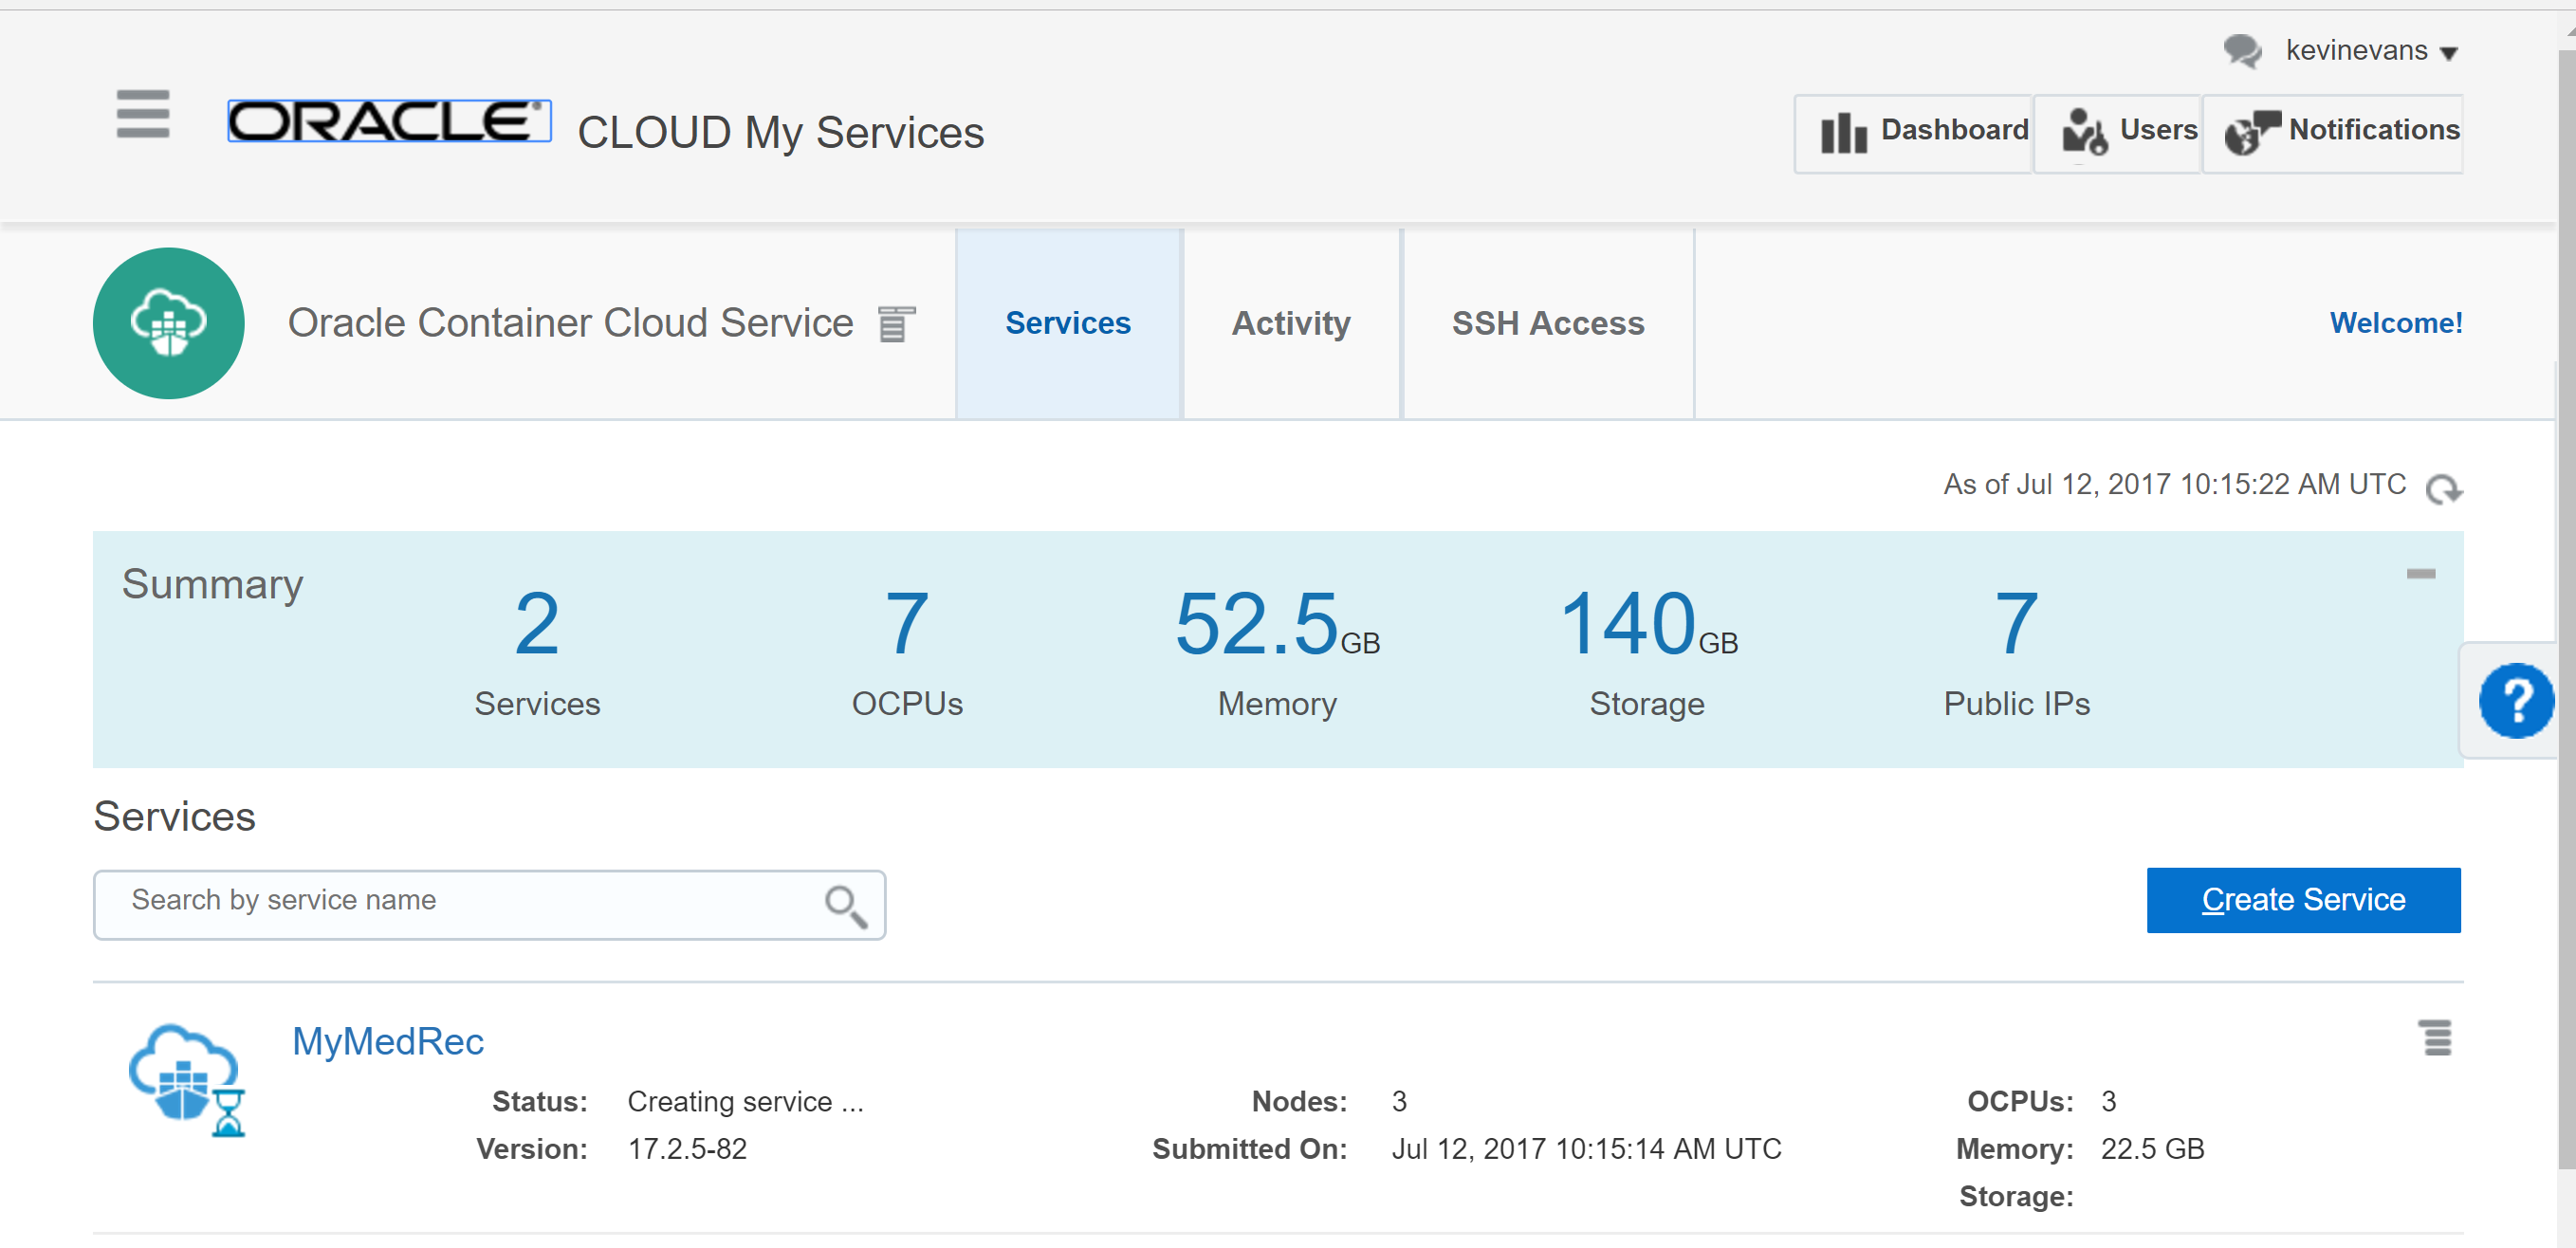
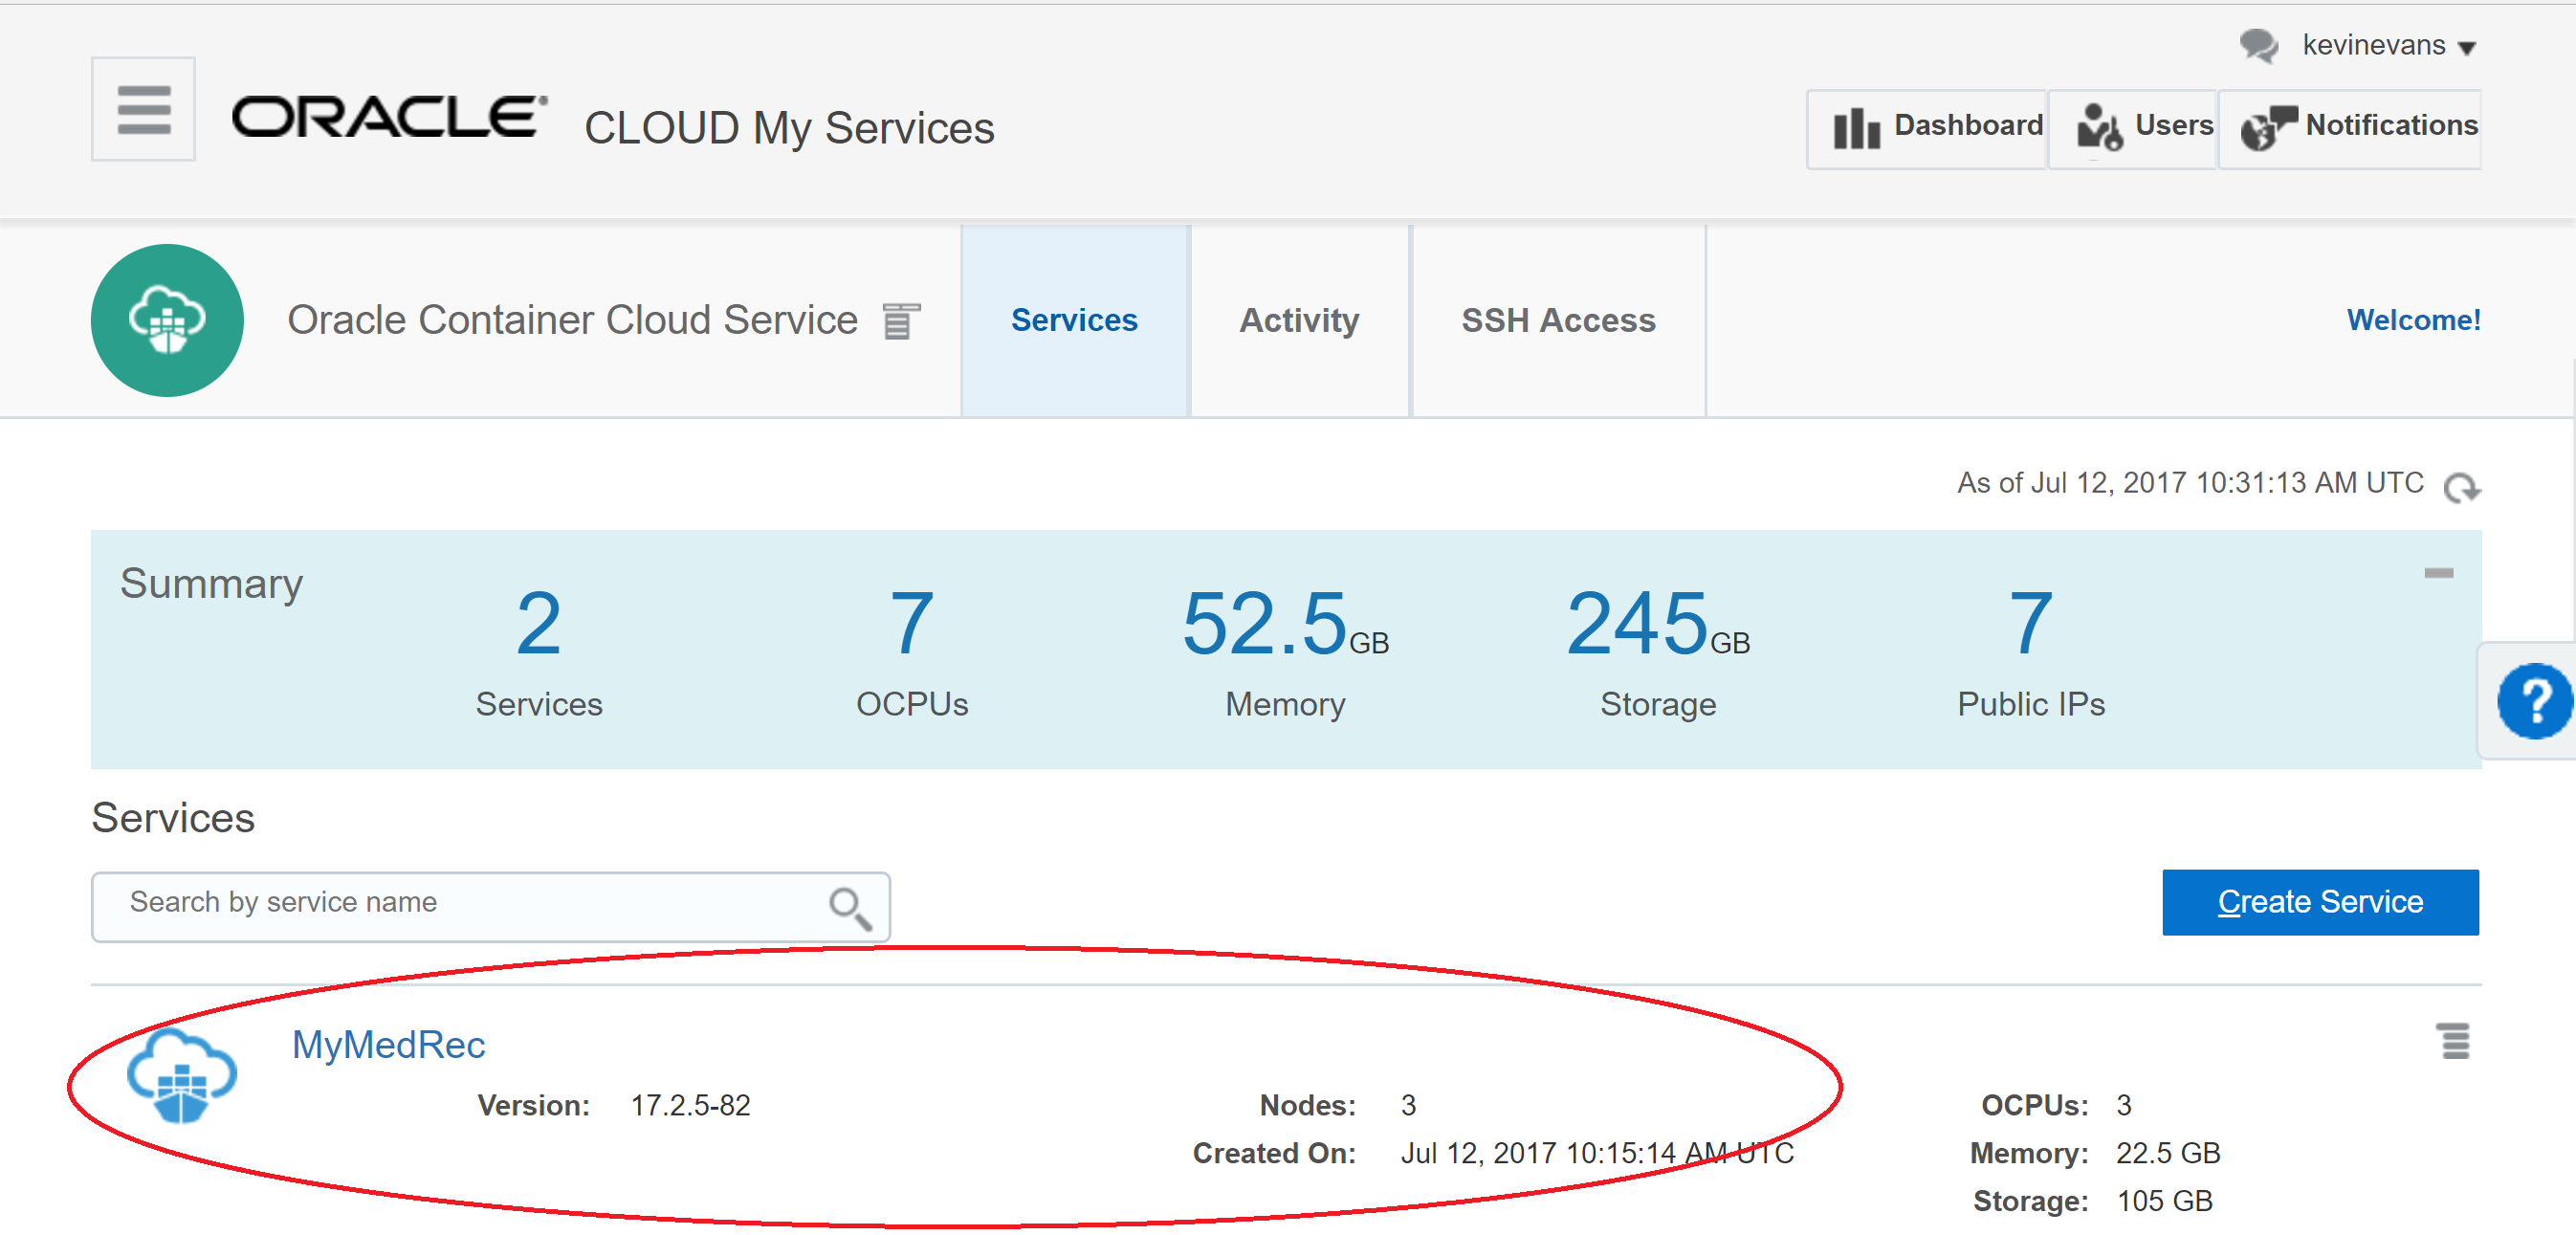
After around 5 minutes the “Creating Service” message will disappear as the Service is now created.
Click the burger menu on the right side of the service and choose Container Console.

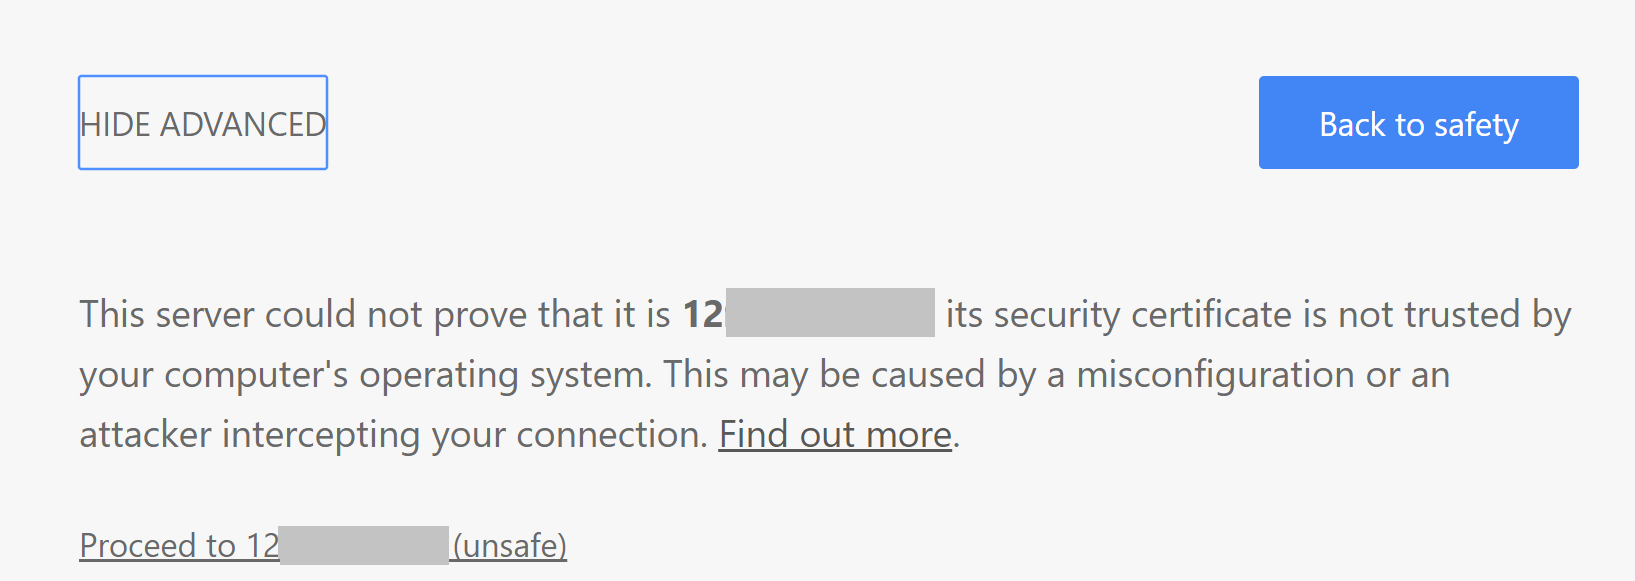
You will see an insecure site warning message. This is because a trusted certificate has not been associated with this node. For the purpose of this exercise, that’s ok, simply click Advanced.
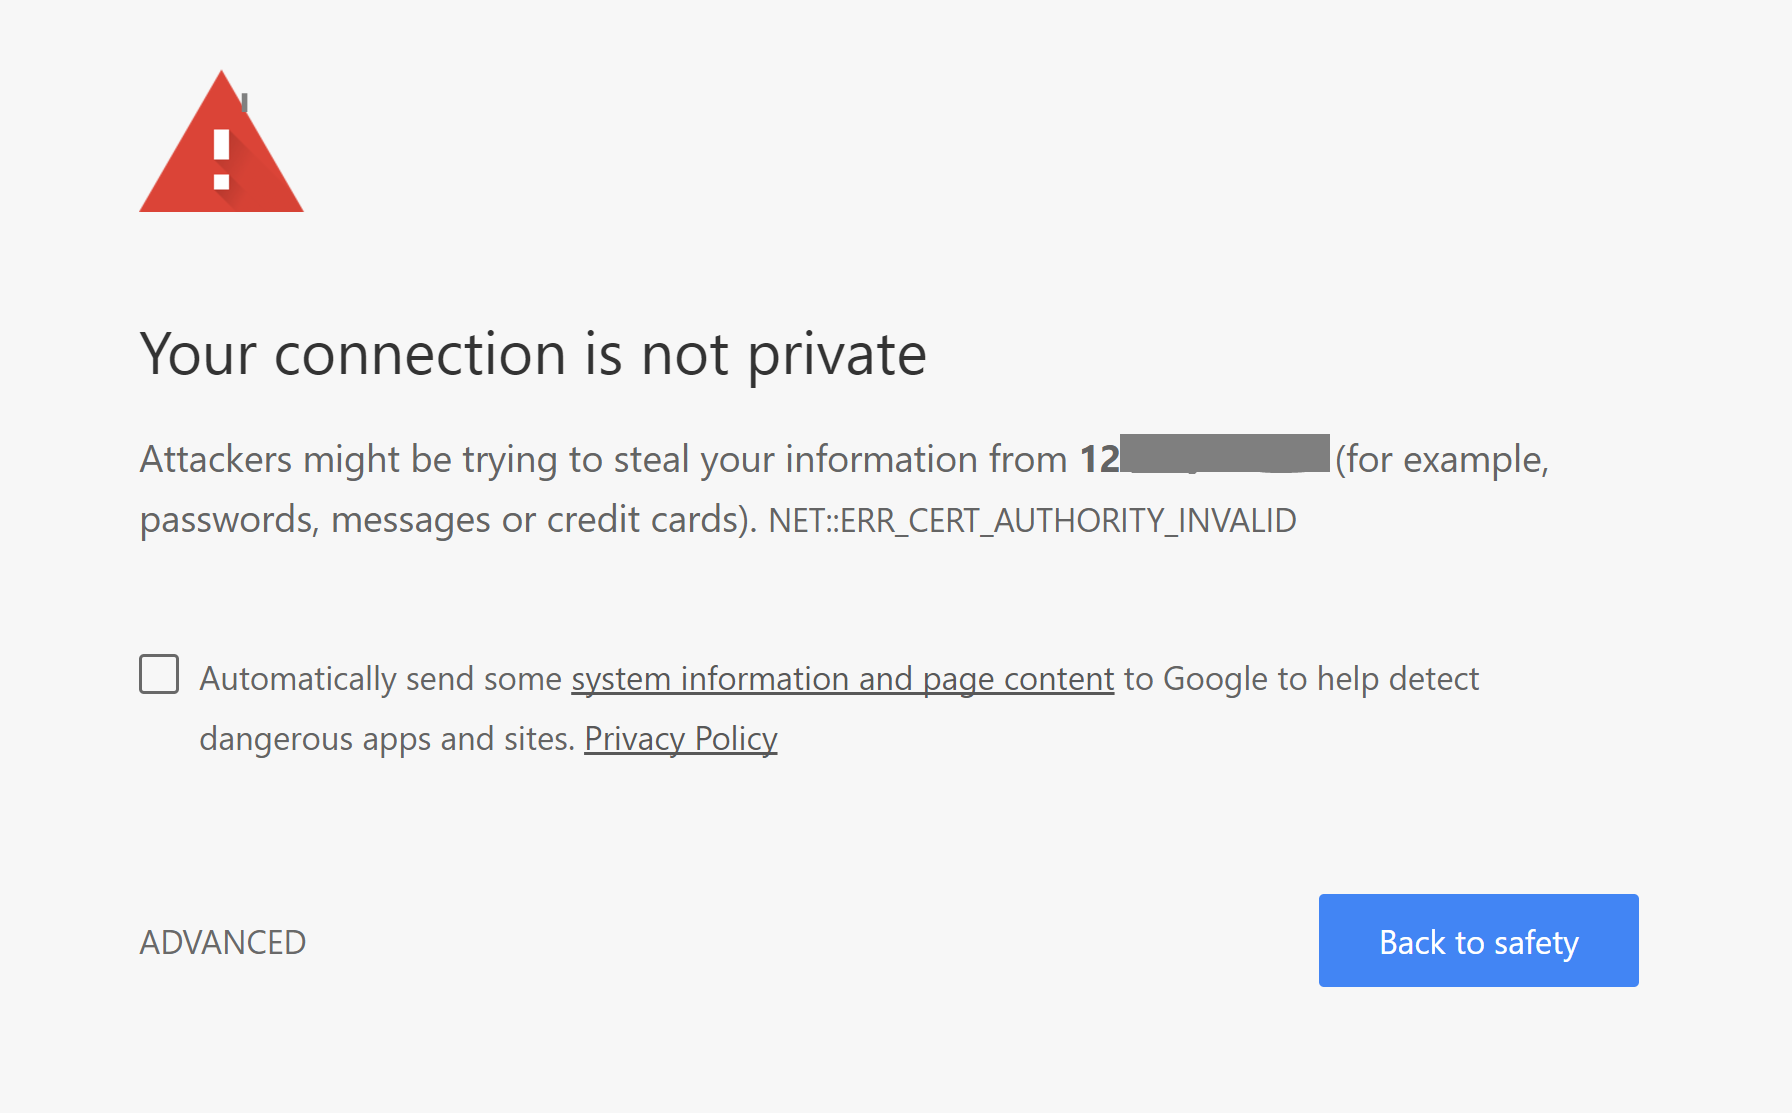
Then, click to Proceed and ignore the warning.
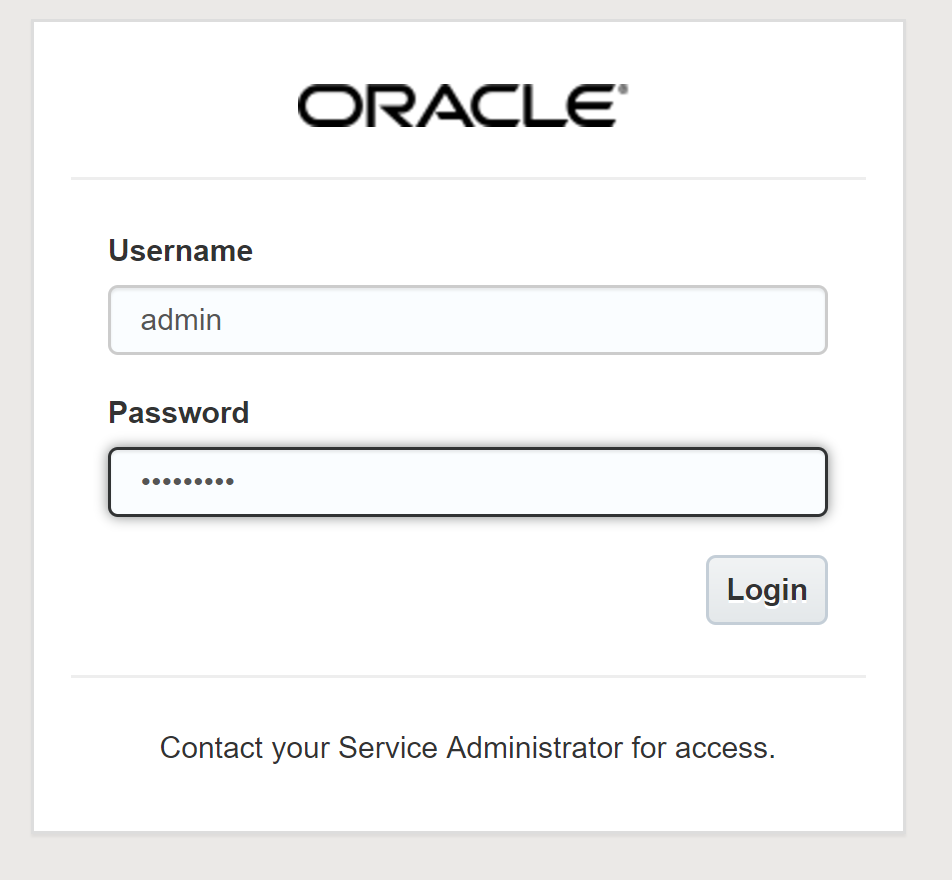
Enter the credentials you specified when you created the service
In the Container Console note the number of hosts allocated to the default Resource Pool. This corresponds to the number of nodes that you entered while provisioning.

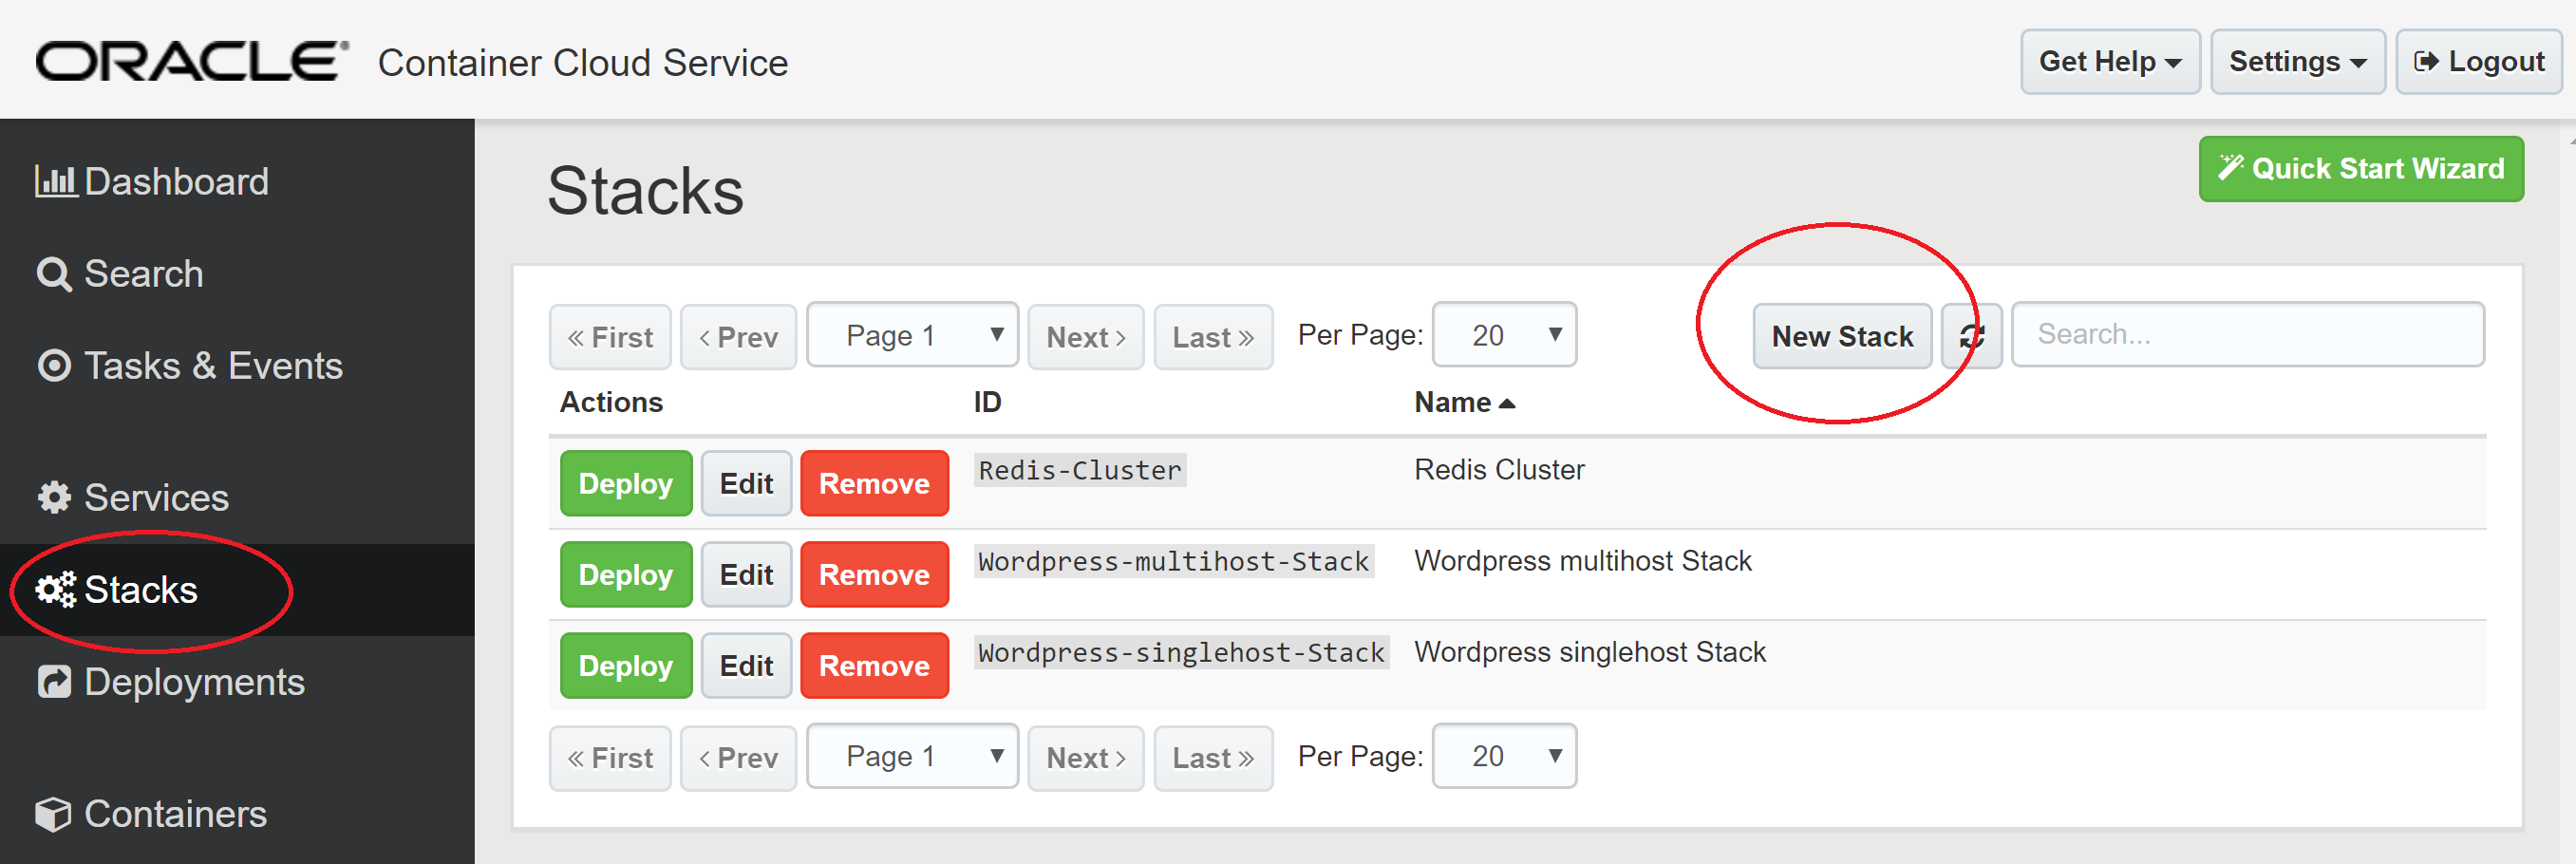
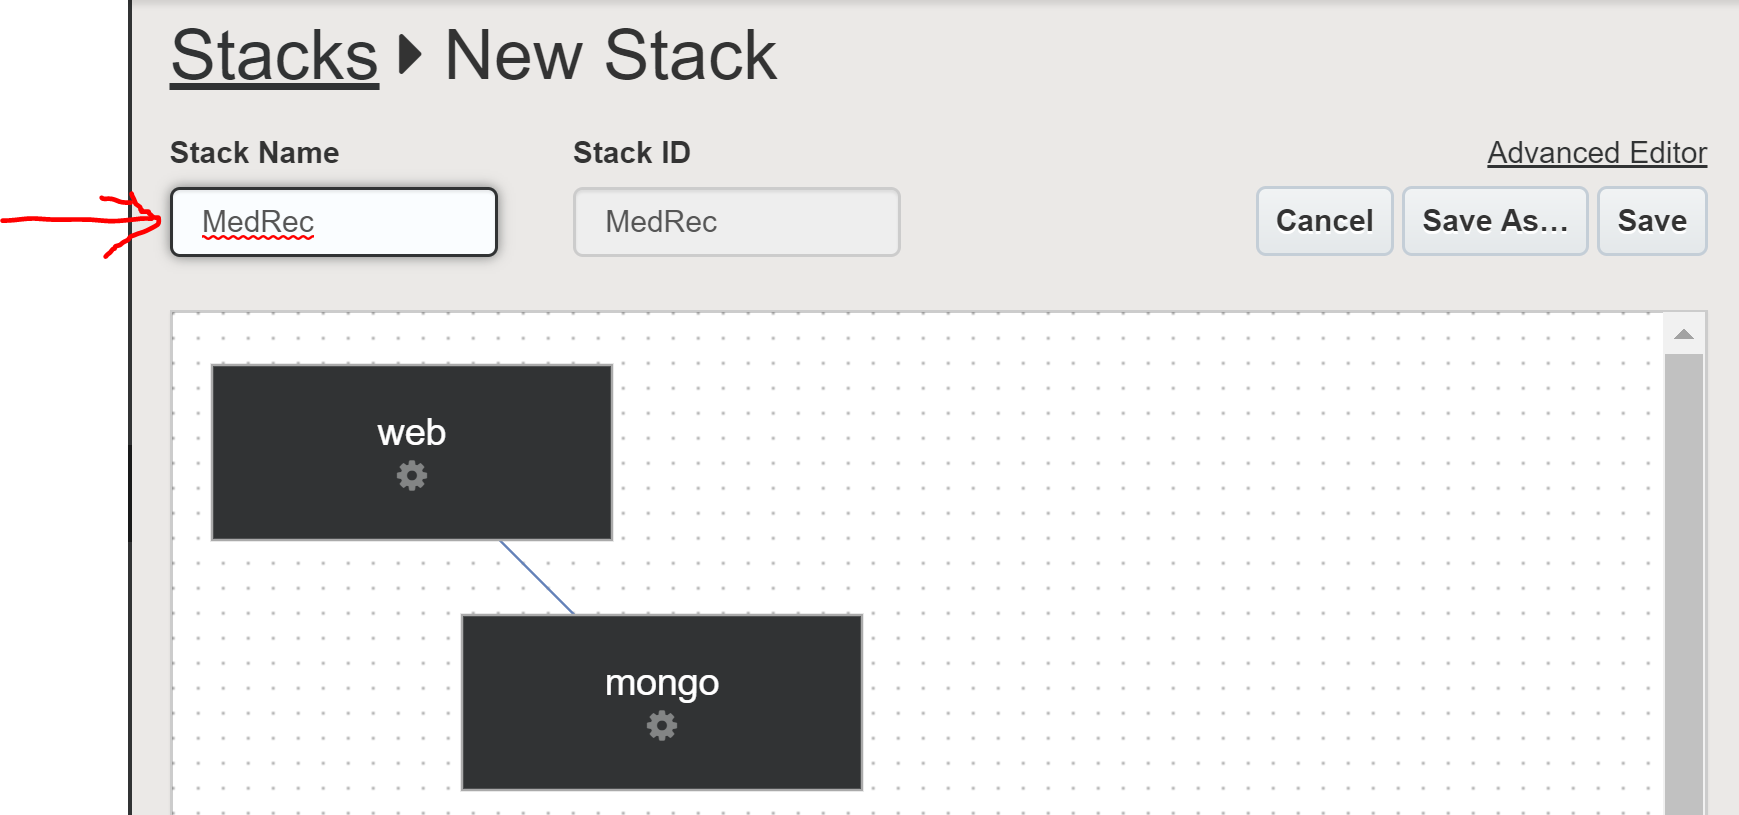
To define a Stack - Click Stacks in the left hand menu. Then, click the New Stack button.
Click Advanced Editor
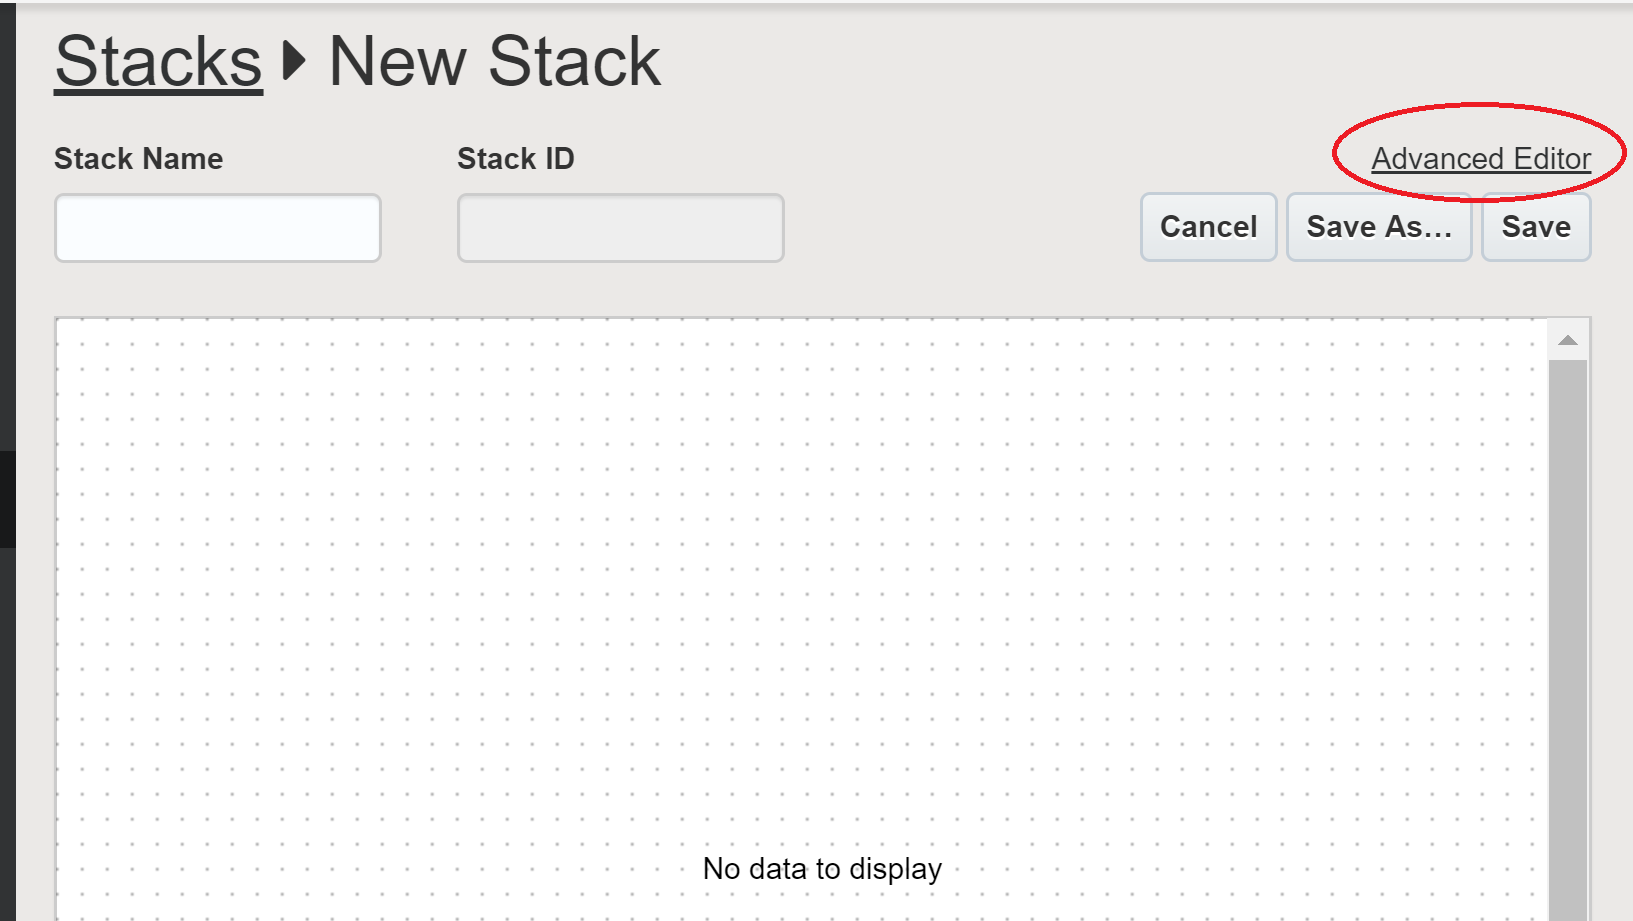
Copy the contents of the occs-stack.yml file (it is located in the ankimedrec-apis project you git forked previously). Paste the contents into the Advanced Editor. Notice that the stack defintion contains two linked services - one for Node.js application, the other for MongoDB.
Then, click Done

Notice that the Stack will graphically represent the associated nodes and their relationship.
Name your Stack something meaningful eg MedRec. Then press Save
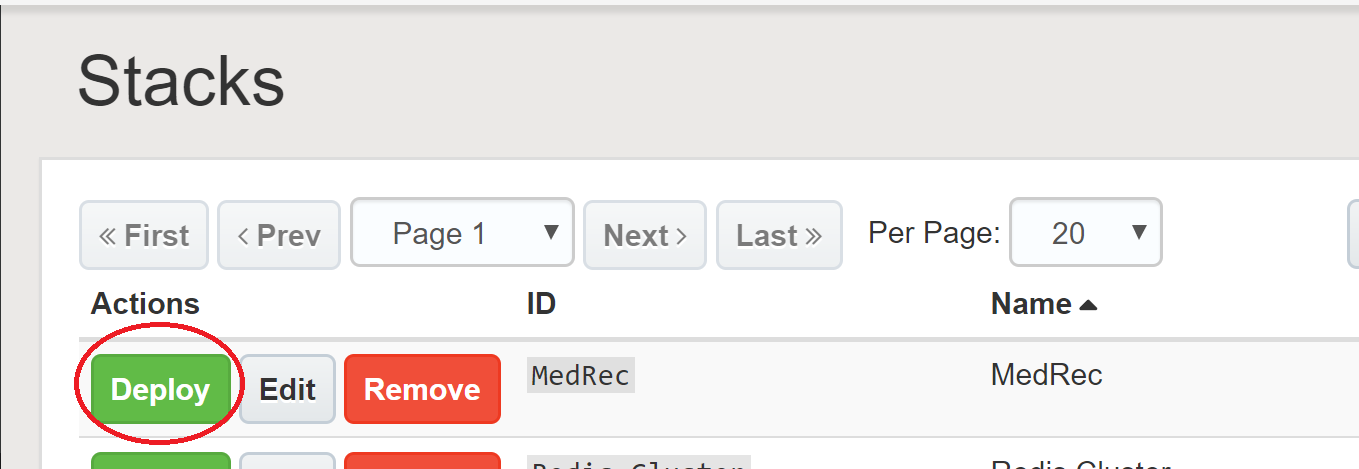
In the list of available Stacks you should now see your MedRec stack.
Click the green Deploy button to deploy your MedRec Stack.
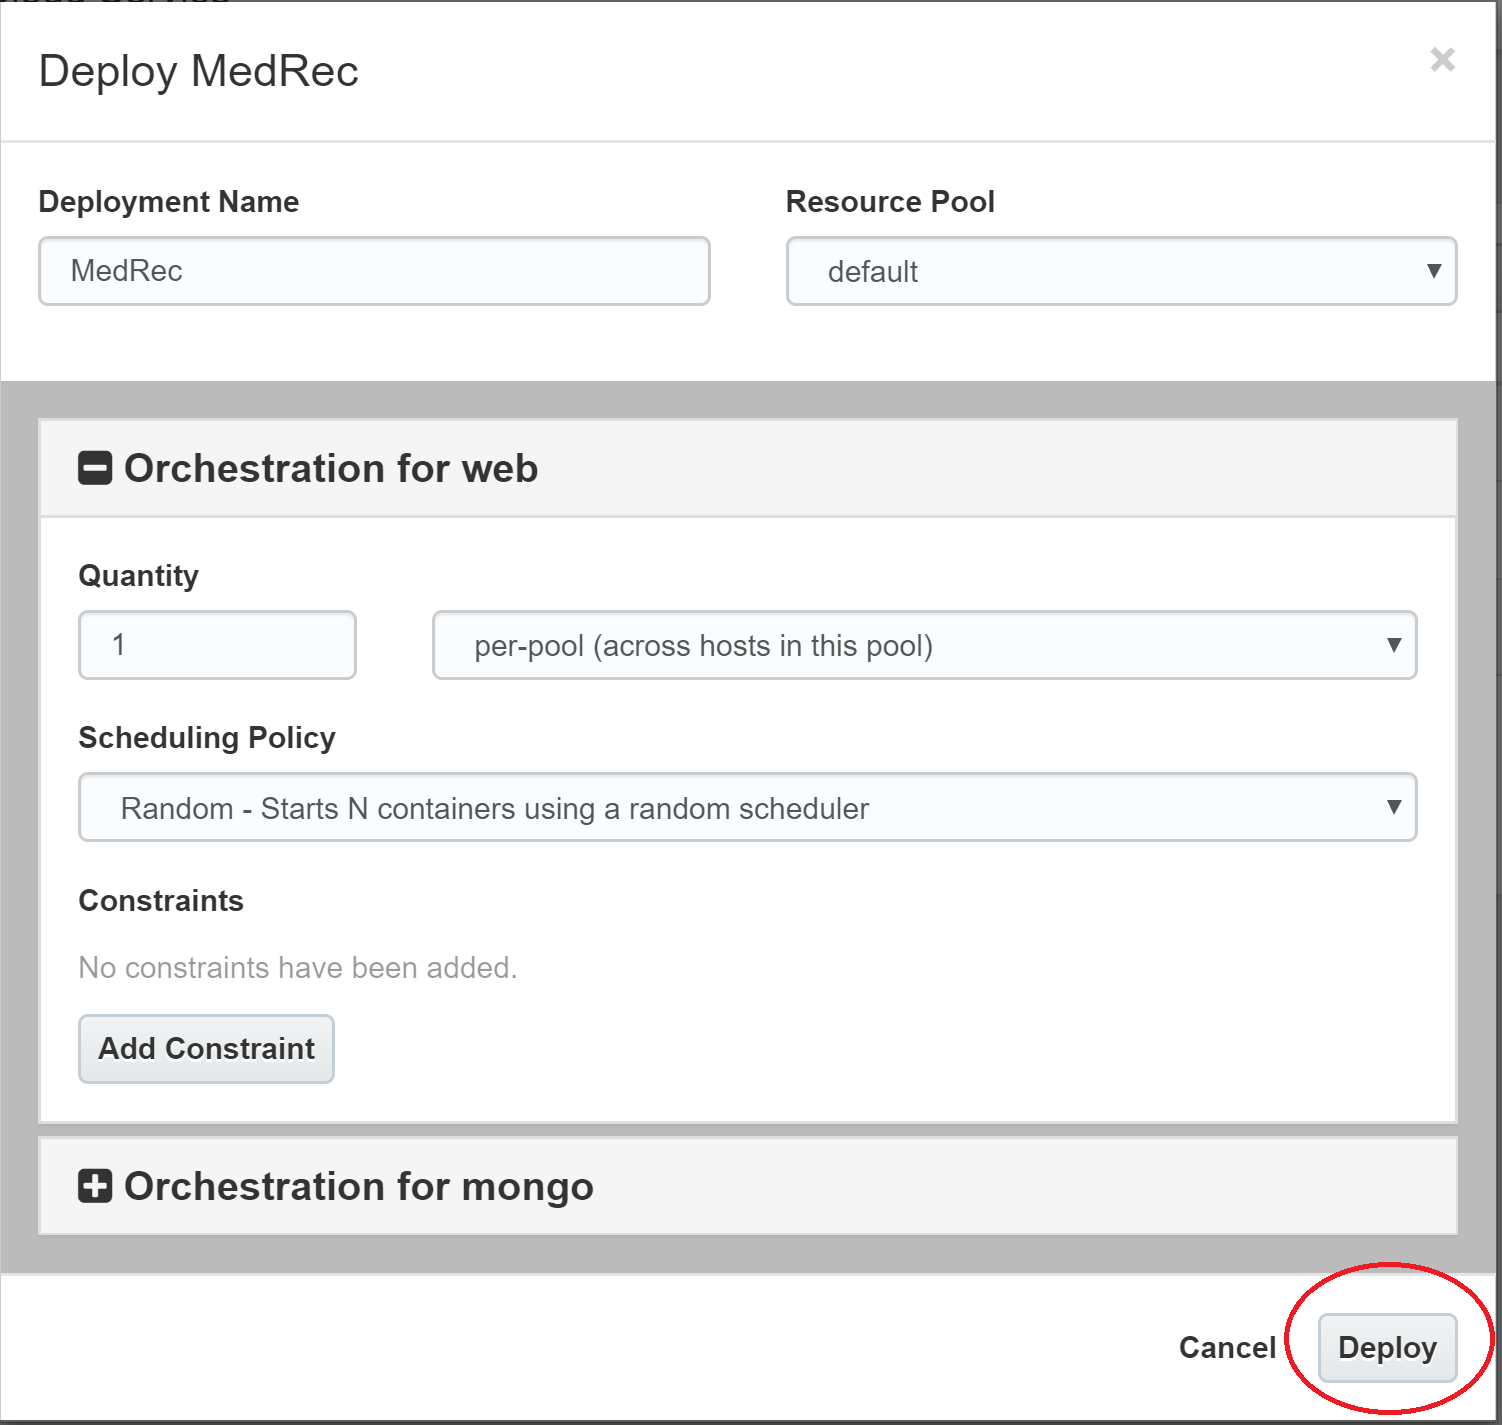
In the Orchestration dialog, you can choose the number of instances to be deployed per container. For now, simply accept the defaults and press Deploy.
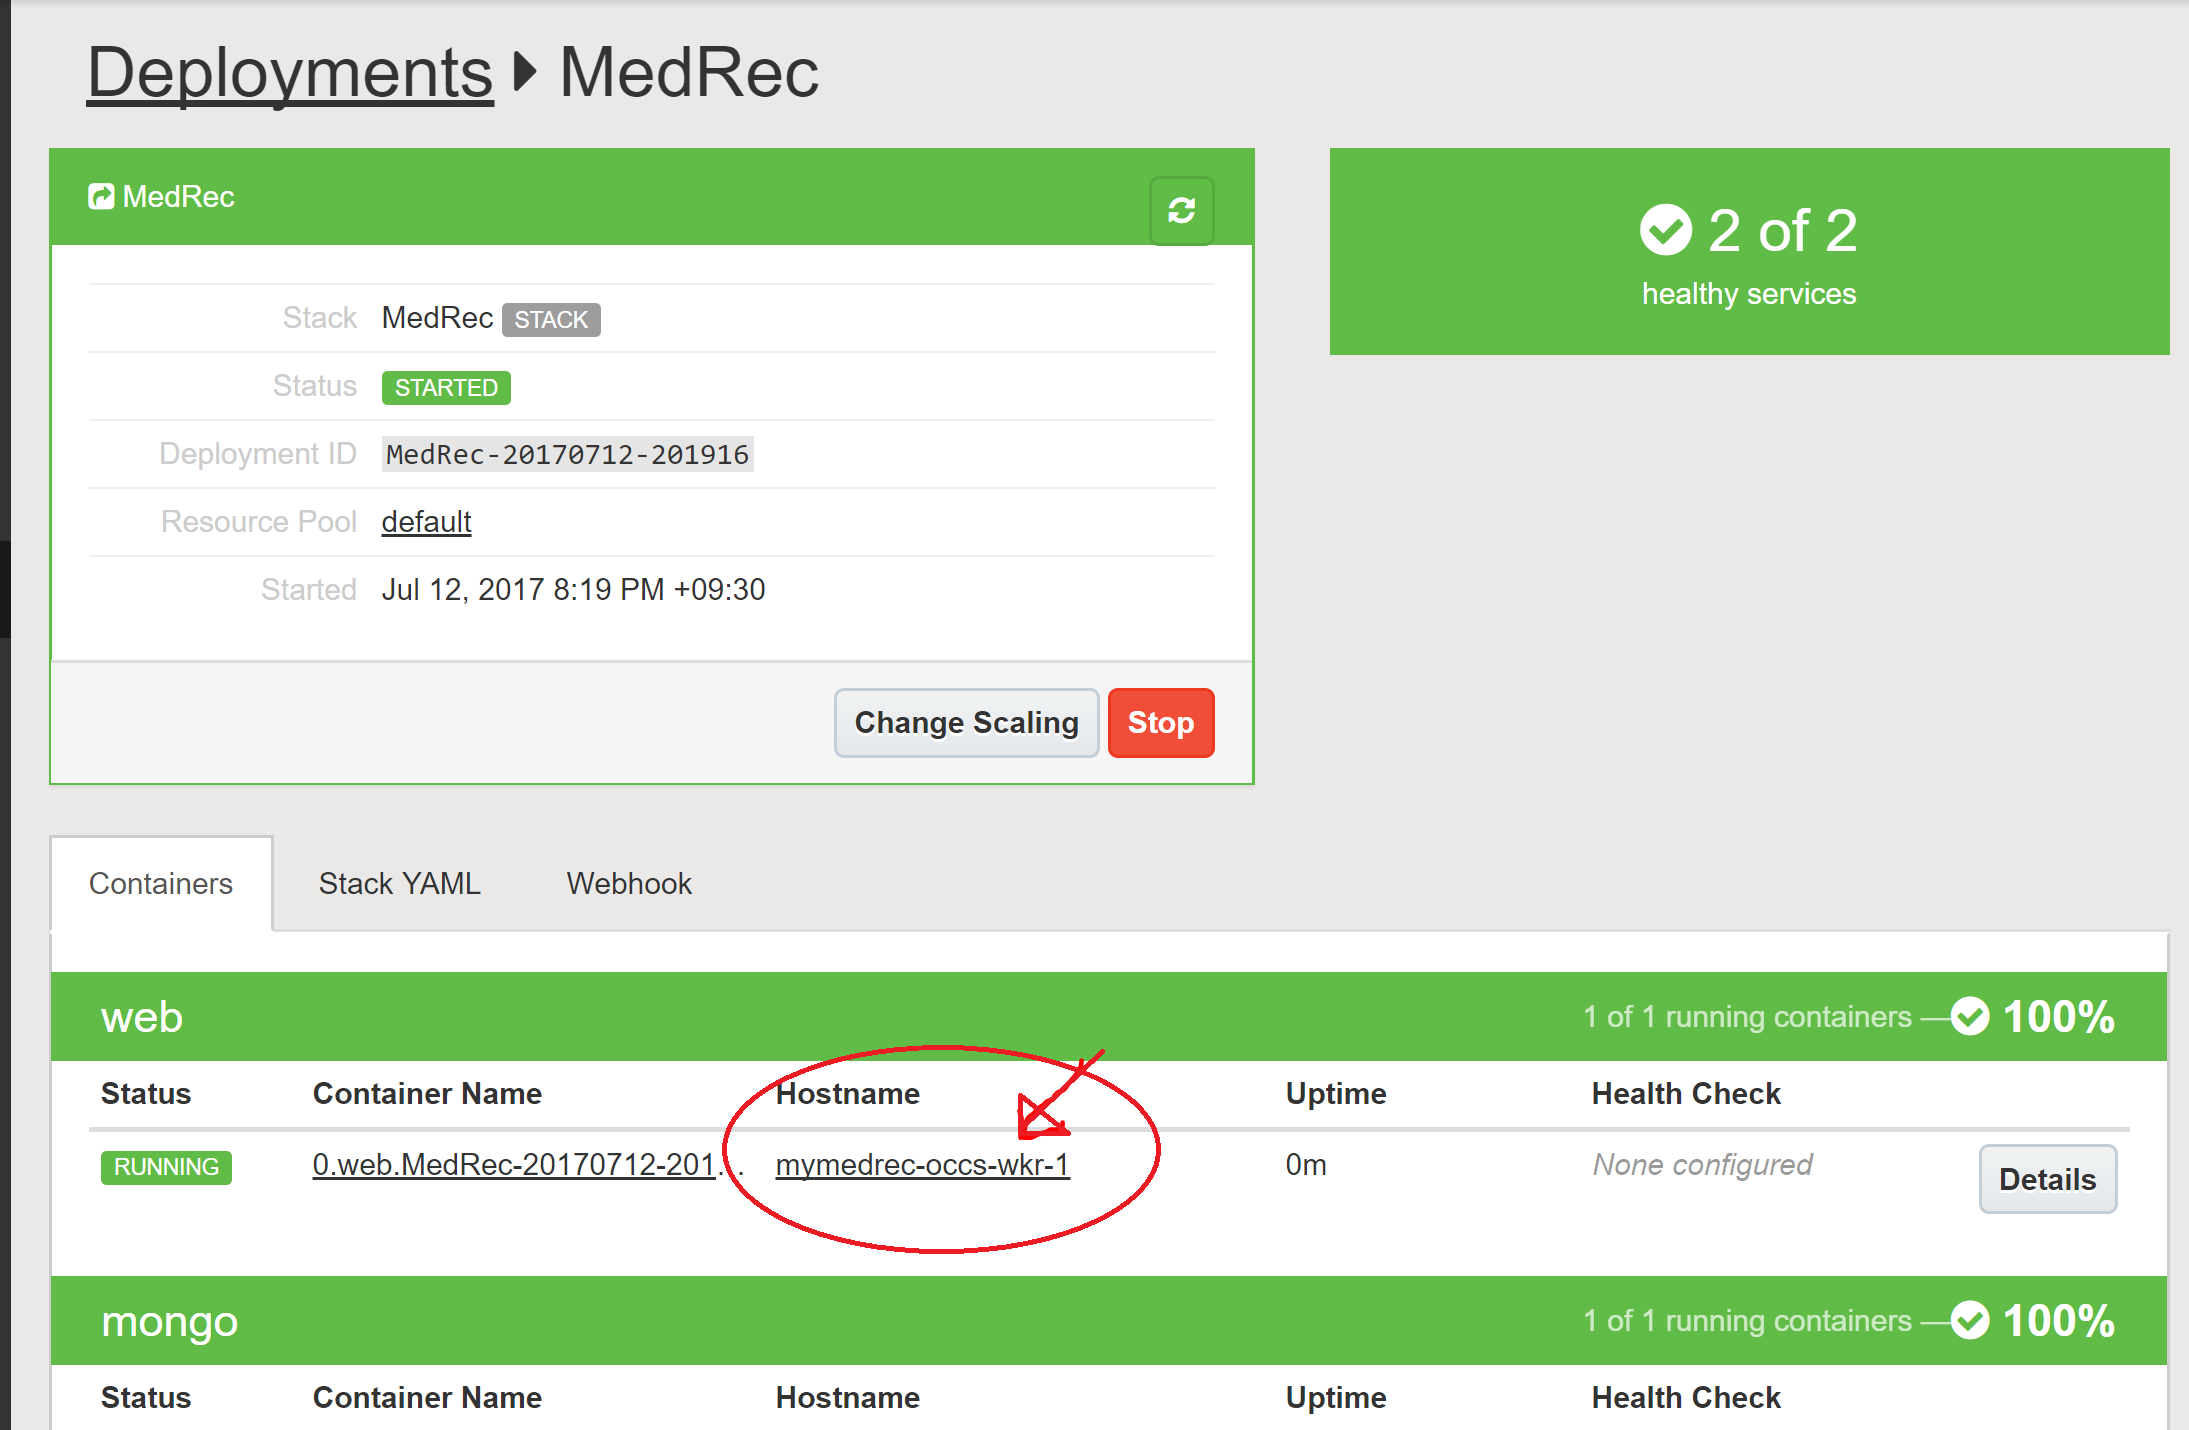
You will see some activity and the screen will flash orange and green until both services are up and running.
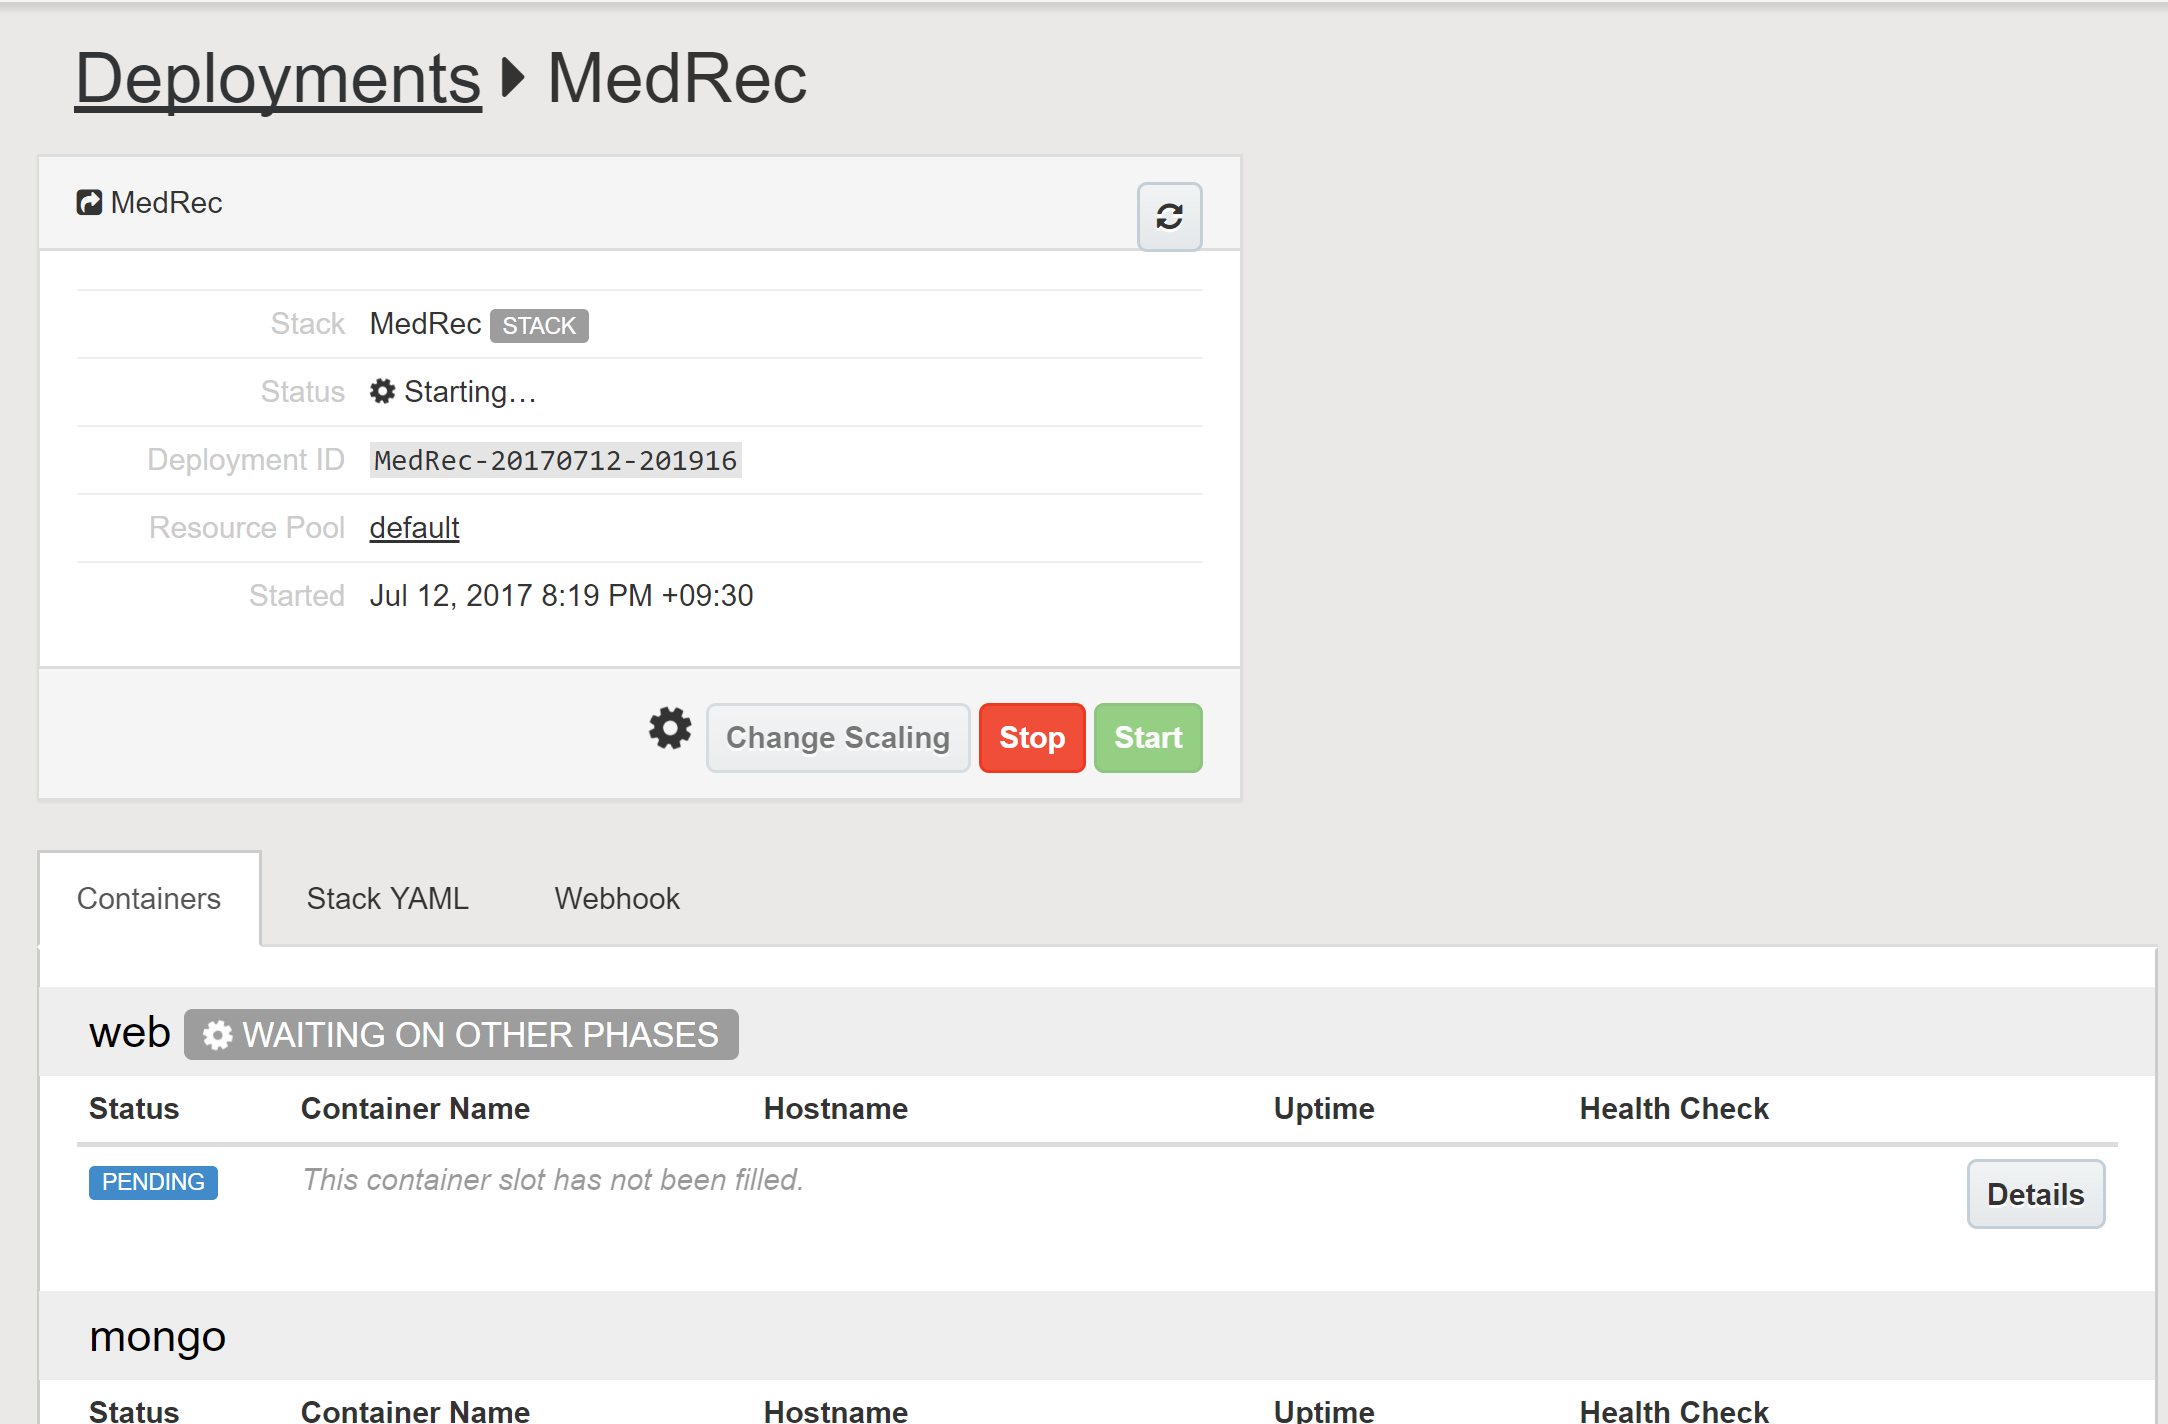
When the screen displays green for both services, click the Hostname that the stack has been deployed to.
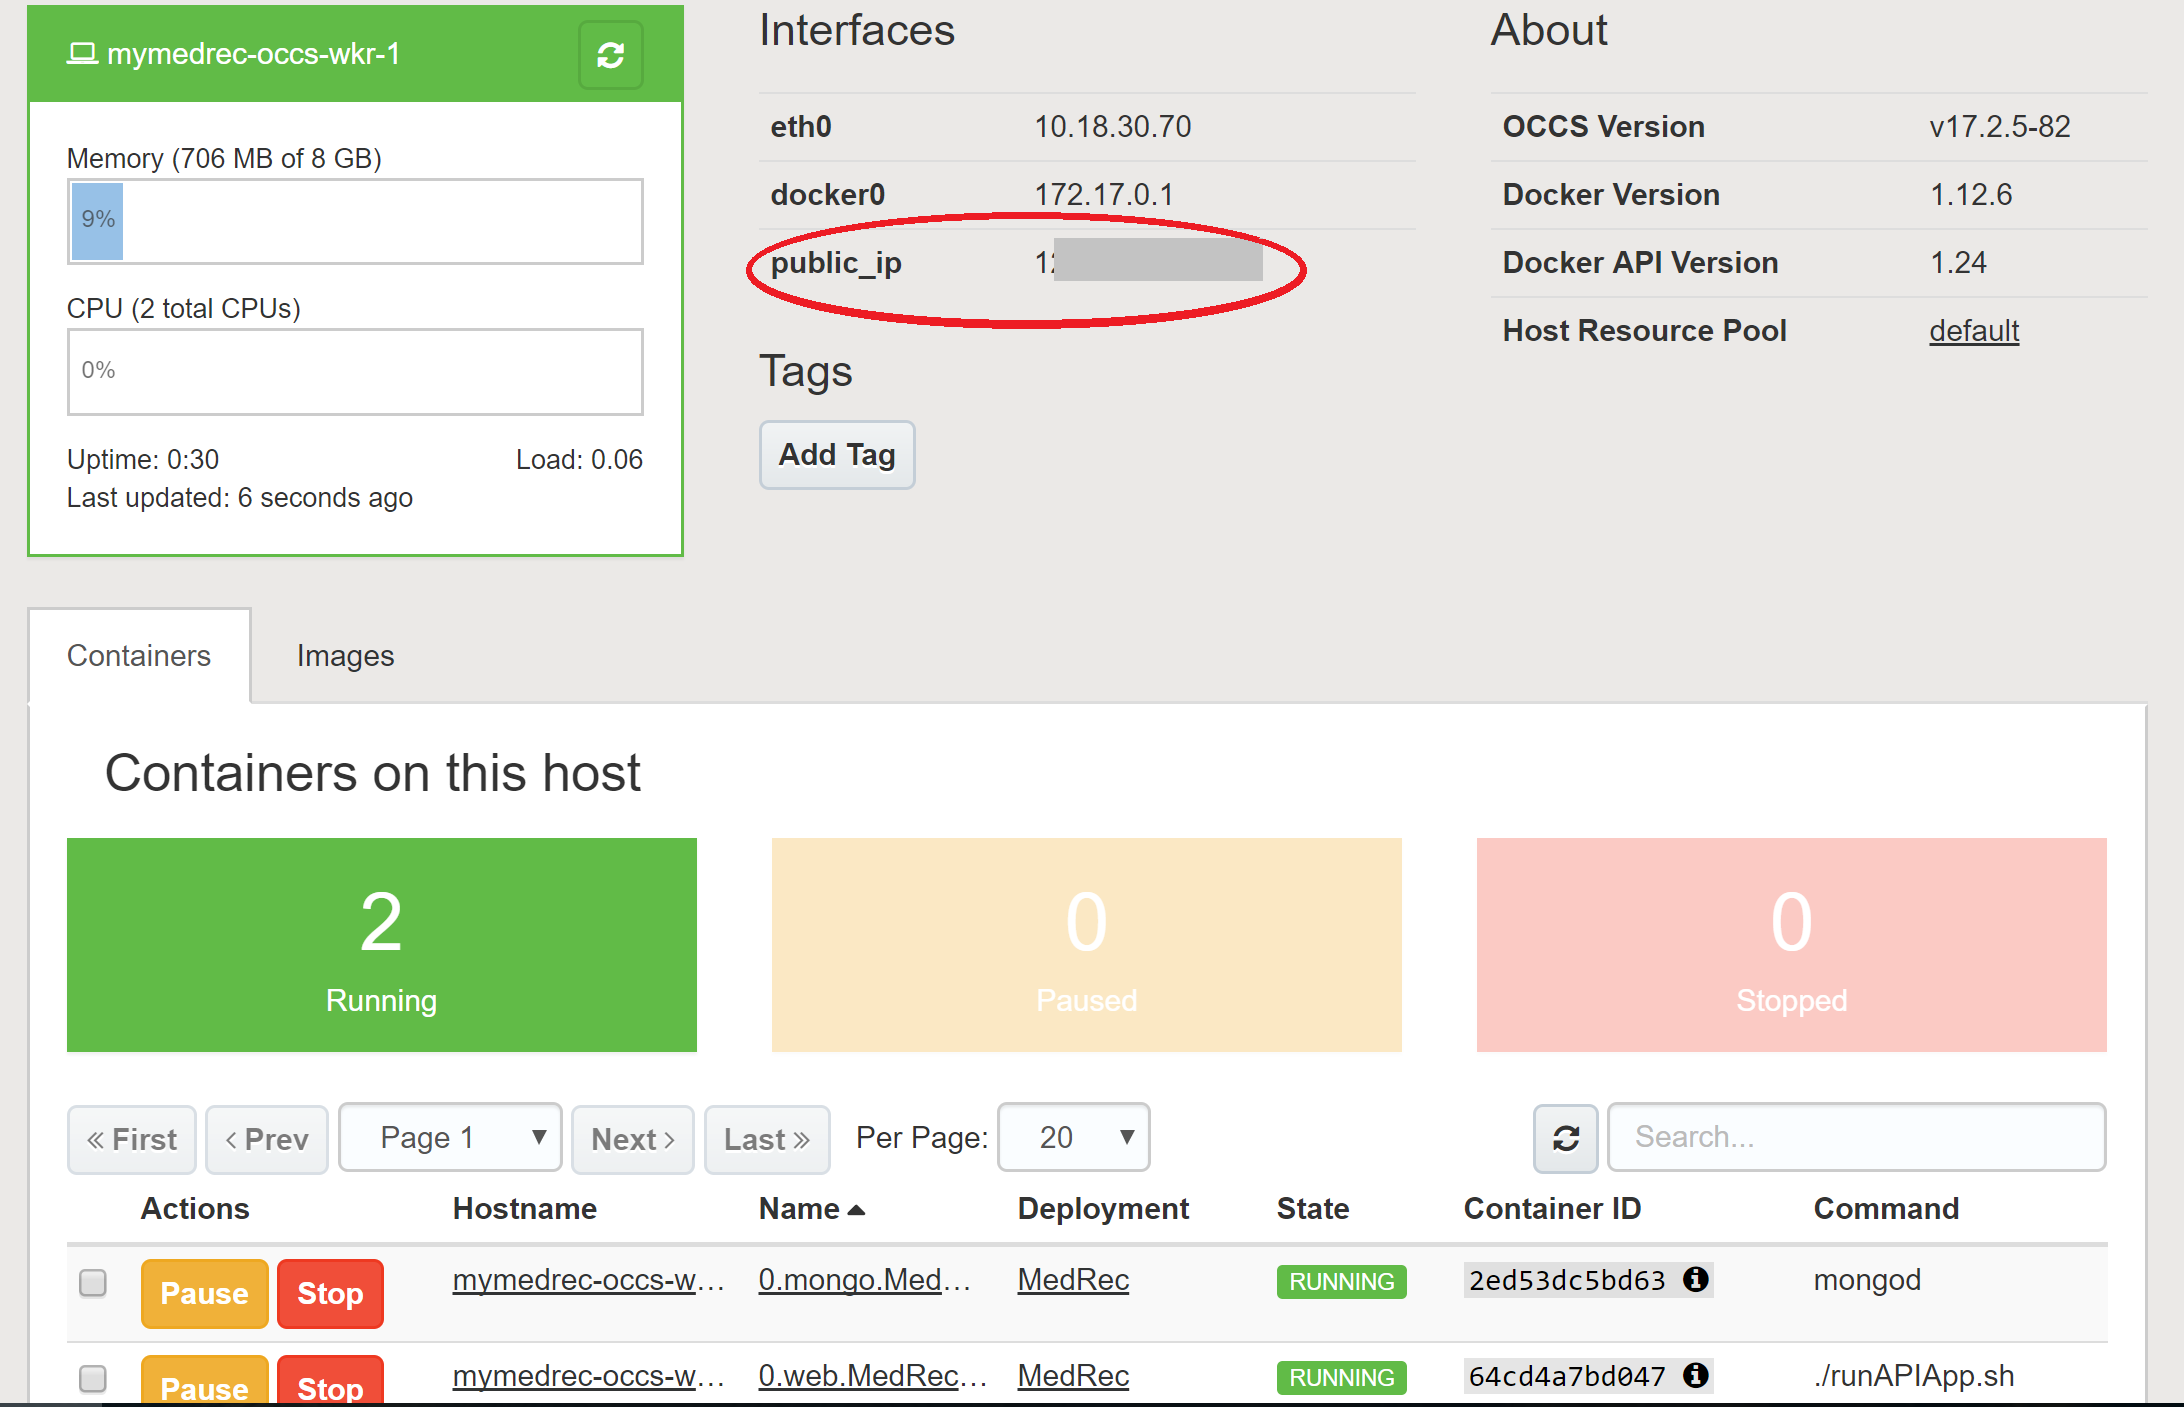
In the page showing details about the specific host (worker node) that the stack is running on, you will see the Public IP address.
In a new browser tab - enter http://[The_IP_of_the_worker_node]:3000 You should now see the Swagger UI.
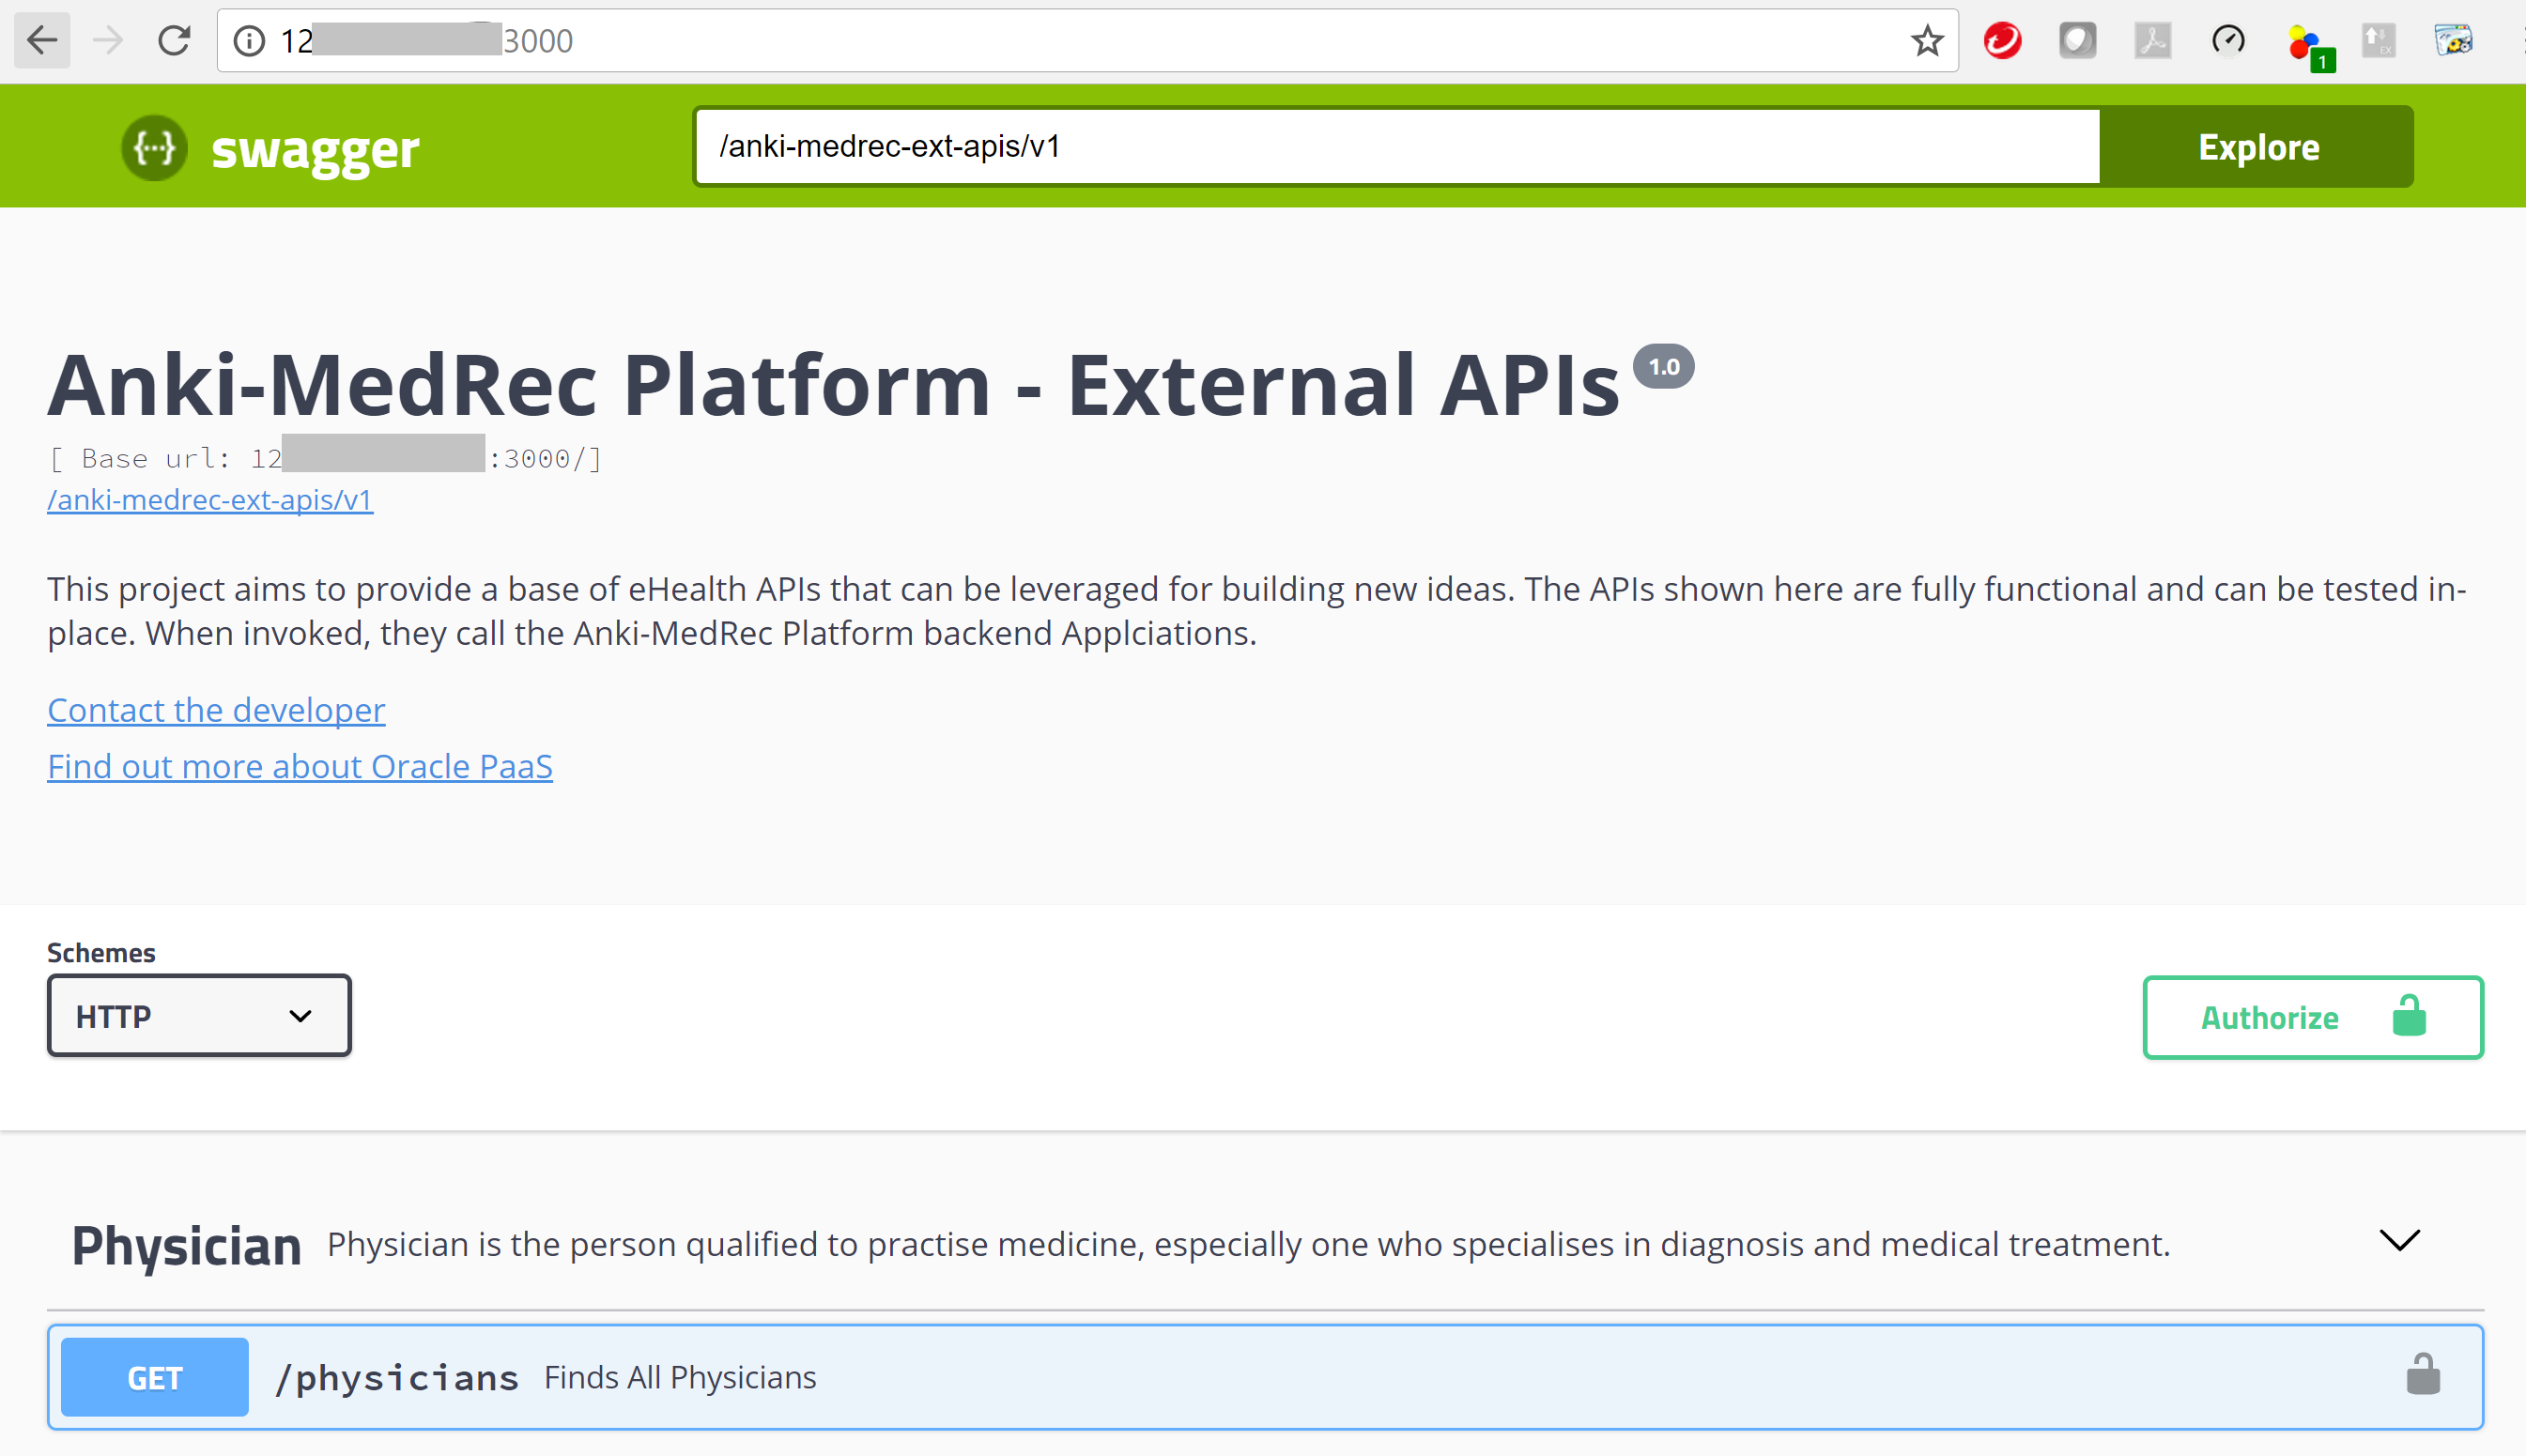
Do a GET Request. It should return an empty collection of Physicians.
Do some POST Requests to add some Physicians and Patients. Then repeat the GET Request to confirm that the new record were fetched from the MongoDB database via the API call.
- No warranty expressed or implied. Software is as is.
- MIT License